
Submitted:
25 March 2025
Posted:
26 March 2025
Read the latest preprint version here
Abstract
It is well established that dental adhesive material are an important factor to achieve adequate adhesion results. However, it is not the only factor that contributes to the final bond strength. Improper operatory field isolation and contamination play an im-portant role in the final adhesion outcome. Background/Objectives: This article aims to give a clinical perspective with evidence-based arguments to find the best possible protocol for an enhanced adhesive protocol. Including why and how to make a rubber dam isolation, how to clean and prepare the dental substrate, and what the gold standard protocols for total-etch and self-etch techniques are. Conclusions: A well-established clinical protocol involving not only the adhesion material selection but also how to create a proper operative site free of contaminants and how to properly clean and prepare the dental substrate is paramount for achieving the best results in dental adhesion. Despite the development of simplified adhesive systems that offer acceptable bond strength results, the gold standard techniques continue to deliver superior and predictable out-comes. Great adhesion results do not depend only on the adhesive material itself but on a synergistic approach involving operative site isolation, substrate cleaning and treat-ment, and protocol fidelity. When these elements are correctly applied, they significantly enhance the reliability of dental adhesion for both direct and indirect restorations, con-tributing to improved restorative longevity.
Keywords:
dental adhesives
; adhesive systems
; rubber dam isolation
; absolute isolation
1. Introduction
The advancement in the development of simplified adhesive systems has introduced numerous advantages, especially in reducing the clinical operational time. However, this simplification resulted in an increased number of techniques to perform the dental adhesion, often leading to confusion on what type of adhesive is being used and what is the correct protocol for that specific adhesive system. The extensive range of available adhesive brands further complicates the selection of the correct protocol to be used.
Various studies have sought to simplify the use of adhesive systems by standardizing protocols for each established technique, aiming to reduce procedural variability and improve clinical results[1,2,3,4]. These studies assist clinicians in selecting the most effective adhesive materials and protocols for each clinical situation. Establishing these protocols reduces the probability of clinical errors and increases efficiency in adhesive procedures within restorative dentistry.
While the selection of the adhesive system is an important factor in achieving acceptable bond strength results, it is not the only factor that influences the outcome. For instance, effectively isolating the operative field is essential to prevent contamination and reduce the overall humidity that may hinder the effectiveness of the adhesive interface.
A good cleaning of the substrate is essential to remove debris and contaminants that may compromise the bonding effectiveness. The longevity of the adhesive interface is not solely determined by the selection of the adhesive system but also by the execution of the correct protocol for each type of adhesive system. A thorough approach that incorporates material selection, procedural standardization, and compliance with evidence-based protocols is critical for achieving consistent and reliable clinical outcomes.
While the standardization of adhesive protocols has contributed to acceptable and predictable clinical outcomes, it is essential to consider that this is not the only factor that will influence the final bond strength. The clinician should consider other equally important factors, including isolation of the operatory field, surface cleaning, and substrate treatment. An approach that integrates these elements is fundamental for achieving long-term clinical success in adhesive dentistry.
This article aims to analyze adhesive systems, clinical protocols, and techniques for optimizing their performance. It is divided into three sections:
- Rubber dam isolation and materials.
- Preparation of the dental substrate for optimal bonding.
- Adhesive techniques and materials.
The first section will address the importance of rubber dam isolation for a good adhesion outcome and how to properly use the rubber dam materials like the sheets, and clamps among others. As an article with a clinical perspective, insights about how to make proper perforation and how to correctly position the clamps to achieve the best proper sealing with the rubber dam will be also addressed.
In the second section, this article will examine the preparation of the substrate necessary to optimize the adhesive process. Key topics will include cleaning protocols designed to eliminate debris and contaminants that may compromise adhesion and how to simplify the cleaning and preparation in complex substrates with dentin exposure.
The final section will concentrate on the selection and protocols of adhesive systems, especially the ones considered the “gold standard” of dental adhesion. Additionally, this section will provide the best protocols for the gold standard adhesive systems for total-etch and self-etch techniques. The performance of adhesive systems in various restorative contexts, including direct composite restorations and indirect restorations such as onlays, inlays, ceramic veneers, and crowns, will also be analyzed to give a clinical view of different approaches.
The primary goal of this article is to establish a clear, evidence-based protocol designed to maximize the longevity and bond strength of adhesive restorations, whether direct or indirect. By systematically addressing all essential steps, from isolation and substrate preparation to adhesive application, this article aims to equip clinicians with the essential knowledge and techniques needed to achieve consistent and predictable results in adhesive dentistry, ultimately enhancing long-term treatment success.
2. Rubber Dam Isolation
To optimize adhesion, the initial step must ensure that the operative site is thoroughly cleaned, adequately dried, and maintained with minimal risk of contamination. Evidence suggests that the presence of elevated relative humidity in proximity to the operative site can significantly compromise bond strength [5,6] It is well established that contamination by saliva, blood, biofilm, or even the hemostatic agent from the retraction cord can also compromise bond strength [7,8,9,10]. Considering this, it is essential to implement strategies to prevent contamination and minimize the relative humidity of the operative site throughout the adhesion protocol. An excellent tool that can bring all of the advantages mentioned above is the absolute isolation with a rubber dam.
The first record of rubber dam isolation dates back to 1867, introduced by a dentist named Sanford Christie Barnum. His goal was to protect the area undergoing restoration from saliva [11]. In 1938, Prime published an article listing 57 reasons for performing absolute isolation, at least two decades before the introduction of the first-generation adhesive system [12]. Among these 57 reasons were the containment of saliva, protection against contamination, safeguarding of the lips, tongue, and oral mucosa from injury, the promotion of a dry and clean environment ideal for cement attachment, increased operative efficiency leading to time savings, and improved visualization of the operative field. All of these factors remain highly relevant in contemporary clinical practice. Rubber dam isolation continues to be essential for preventing contamination, maintaining a dry and clean operative field, protecting soft tissues, enhancing procedural efficiency, and optimizing adhesive performance. These fundamental principles contribute to improved clinical outcomes and remain indispensable in modern adhesive and restorative protocols.
There is a limited number of studies directly comparing bond strength with and without rubber dam isolation. Consequently, it is not possible to assert with absolute certainty that a significant difference exists in the final bond strength and longevity of adhesive restorations. However, it is well established that adhesion is compromised when the bonding environment is contaminated by substances such as blood or hemostatic agents, when moisture is present due to saliva or water, or when the relative humidity is excessively high [5,6,8,9,10]. By logical inference, given that rubber dam isolation effectively creates a low-humidity, dry, and contamination-free environment, its proper implementation can be reasonably expected to provide optimal conditions for adhesive procedures (Figure 1).
The primary challenges associated with the use of rubber dam isolation are largely attributed to the clinician’s insufficient knowledge and/or training in its proper and safe application. A lack of proficiency in rubber dam isolation may lead to complications such as periodontal injury, tearing of the rubber sheet, patient discomfort due to improper clamp placement, and the potential risk of fracturing a structurally compromised tooth. Furthermore, inadequate isolation may result in fluid leakage due to an improper seal, which can stem from incorrect perforation of the rubber sheet or the selection of an inappropriate rubber sheet.
To properly use the rubber dam isolation some guides should be followed:
- Selection of the rubber sheet
- Selection of the area of isolation
- Proper perforation
- Proper sealing
- Selection of the clamps
2.1. Selection of the Rubber Sheet
To understand how to select the appropriate rubber dam sheet for each case, it is essential to first recognize the different types of sheets and their impact on the final isolation. Rubber dam sheets can be distinguished by their thickness, size, and composition. While thicker sheets offer better protection for oral tissues, provide more effective containment of intraoral fluids, and are more resistant to tearing, thinner sheets are easier to pass through contact points and more comfortable for the patient. However, thinner sheets are more prone to tearing and often fail to adequately contain intraoral fluids. The primary drawbacks of thicker sheets include the difficulty in passing them through proximal contacts and the tension they exert on the most posterior clamps, which may lead to their displacement.
There are two sizes of rubber dam sheets: 5x5 inches and 6x6 inches. The 5x5-inch sheet is typically used for children, while the 6x6-inch sheet is recommended for adults. The 6x6-inch sheet is generally preferred, as it can be paired with a smaller frame, providing greater flexibility for adjusting the sheet’s tension [13]. The composition of the sheet is also an important factor in case-by-case selection. Rubber dam sheets are available in latex and non-latex options, making it essential to consider patients with latex allergies. The primary difference in composition lies in its effect on the sheet’s elasticity. More elastic sheets provide less tissue retraction and reduced containment of fluids, whereas less elastic sheets offer greater tissue retraction but can be more challenging to manipulate. The non-latex options are typically more flexible (e.g., Flexi Dam, Coltene, Switzerland). However, for both latex and non-latex rubber dam sheets, elasticity may vary depending on the manufacturer. Most cases can be properly isolated with a medium gauge rubber dam sheet (e.g., Nic tone, MDC Dental, Mexico) (Figure 2).
2.2. Selection of the Area of Isolation
To determine the appropriate area for isolation, several factors must be considered, including which teeth will be restored (anterior or posterior), the number of teeth involved, and whether the restoration extends to the proximal surfaces. For anterior teeth, a general guideline is to extend the isolation of at least two teeth beyond the most posterior tooth being restored. For posterior teeth, the isolation should extend at least one tooth posteriorly and two teeth anteriorly to the tooth being treated. If only a single tooth is being restored and the restoration does not involve the proximal surfaces, isolation can be achieved with a single perforation for the tooth undergoing treatment.
2.3. Proper Perforation
It is important to emphasize that the portion of the rubber dam covering the papillary region remains unchanged. Therefore, the perforation pattern should account for the interproximal distances to ensure proper spacing between the holes. As a general guideline, perforations should be placed 5 mm apart. For molars, the perforations should be 7 mm apart, considering that the hole created by the puncher already occupies approximately 1,5 mm per perforation. In patients with diastemas, the perforation spacing should be increased by at least 1.5 mm in addition to the standard 5 m for most teeth or 7 mm for molars to ensure proper adaptation of the rubber dam. There are perforation guides available on the market that can assist with the initial marking of the perforations. If any adjustments are required, such as in cases of diastemas that requires at least 1mm extra of distance between markings, they should be made after the initial marking (Figure 3).
2.4. Proper Sealing
A proper seal of the teeth by the rubber dam sheet is paramount for effective isolation. Inadequate sealing may allow fluids to bypass the barrier, leading to contamination of the tooth being treated. Improper sealing can result from the tearing of the sheet, failure of the sheet to pass through the interproximal contact, or interference from the clamp, preventing the sheet from properly adapting to the tooth.
For proper sealing, several key aspects must be considered. The insertion of the rubber dam through the contact points should be performed gently to prevent damage to the sheet or gingival tissues. One technique involves mimicking the action of dental floss, and applying buccopalatal tension while carefully guiding the rubber dam through the contact point. Alternatively, waxed dental floss (preferably a wider type) can be used to progressively guide the rubber dam through the contact. This process begins by applying pressure on the occlusal surface of one tooth until one end of the sheet passes through the contact. The same maneuver is then repeated on the occlusal surface of the adjacent tooth, ensuring that the rubber dam is properly positioned around the interdental papillae for optimal isolation.
To achieve an effective seal of the rubber dam around the tooth with the primary clamp (typically the most posterior tooth), additional steps are required if it is not the last tooth in the patient’s arch. In such cases, dental floss should be carefully passed around the distal side of the clamp, ensuring it secures the rubber dam in place. The floss is then guided through the proximal contact, creating an effective seal on the distal aspect of the tooth holding the main clamp.
The rubber dam may often become trapped on the primary clamp, preventing proper contact between the sheet and the tooth. To avoid this issue, the clinician should secure the rubber dam in place while gradually releasing one side of the clamp at a time using clamp forceps. This controlled adjustment allows the rubber dam to adapt correctly around the tooth, ensuring an effective seal and optimal isolation.
2.4. Selection of the Clamps
To select the appropriate clamp for each case, it is essential to first understand the function of each type. Clamps can be categorized as retentive clamps (primary clamps) and retraction clamps (auxiliary clamps). Primary clamps are placed on the most posterior tooth to secure the rubber dam in position, ensuring a stable and unobstructed operative field for the clinician. Auxiliary clamps, on the other hand, are used to retract the gingival tissue, providing better exposure to the area to be restored.
To ensure the stability of the clamp, it should function like a chair, with four contact points ideally distributed as far apart as possible. If the clamp has only three or fewer contact points, or if there is an area of continuous contact on one or both sides, it will become unstable, allowing the rubber dam to shift or even dislodge the clamp from the tooth. Auxiliary clamps are typically thinner to enable tissue retraction with minimal to no damage to the gingiva. However, due to their reduced thickness, they offer less stability and may require additional reinforcement, often achieved by applying flowable composite for stabilization (Figure 4).
3. Substrate Preparation
After the rubber dam isolation, the operative site should be set for the adhesive protocol but the tooth can still be contaminated by saliva, blood, or biofilm. This contaminant has to be thoroughly removed so it doesn’t affect the bond strength [14,15,16]. Before initiating the adhesive protocol, it is crucial to emphasize that enamel and dentin must be treated differently to achieve optimal adhesion. While both substrates should be thoroughly cleaned and dried before the adhesive procedure, dentin requires surface roughening to enhance bond strength [17,18], as contaminants introduced during rubber dam isolation (or during provisionals) can compromise its bonding capability. This roughening process can be performed using carbide burs at low speed to reduce the amount of smear layer produced [18]. The drawback of this approach is that the cleaning process must be performed first using pumice and water. In many cases, smaller Robinson brushes are required to access difficult areas effectively. Following the cleaning step, the dentin must be roughened using carbide burs to optimize adhesion. This can be time-consuming and, depending on the area, not very effective.
Another approach to dentin roughening is air particle abrasion (APA) using bioactive glass or alumina particles. The primary advantage of this technique is that it simultaneously cleans and roughens the dentin, thereby reducing clinical time while enhancing efficiency. Another advantage is the increased surface area, surface energy, and better micromechanical interlock produced by the APA [19,20,21,22,23,24]. Additionally, due to the small particle size, APA can more effectively access difficult areas, ensuring a more uniform surface cleaning. The main drawback of this approach is the necessity of an air particle abrasion (APA) jet device, such as AquaCare (Velopex, London, UK) or similar systems. Additionally, to prevent unwanted abrasion and preserve the integrity of adjacent teeth, it is essential to protect the neighboring tooth with a metal matrix during the procedure.
Based on these findings, two distinct protocols can be established to optimize adhesive performance.
- Air Particle Abrasion (APA) Protocol: This protocol is applicable for both enamel and dentin. It employs air abrasion with bioactive glass or alumina particles to simultaneously clean and roughen the substrate. To ensure optimal performance, the particle size should be less than 50 microns, applied at a pressure of 4 bar for approximately 5 seconds. This technique provides a more homogeneous surface treatment, facilitates access to difficult areas, and improves adhesive bonding by increasing surface energy and micromechanical retention (Figure 7).
4. Adhesive Systems
The first things that need dot be addressed to understand the adhesive systems are the three main actors in the dental adhesive process. The demineralization of the tooth structure, the infiltration of the dentin, and the actual bonding agent.
- The demineralization of the tooth structure: Since Buonocore [25] the phosphoric acid etching of the tooth structure has been one of the foundations of dental adhesion. Acid etching of enamel demineralizes the structure creating microretentions where the dental bonding agent will interlock and form a hybrid layer when polimerized [25,26,27,28,29,30]. Acid etching performed on dentin, results in partial demineralization, exposing the collagen fibril network by dissolving the mineral phase (hydroxyapatite) [28,31,32,33]. This process allows resin monomers to infiltrate the exposed collagen and form a hybrid layer when polymerized. With the advancement of adhesive systems, self-etch systems were introduced, in which the adhesive primer penetrates the dentin while simultaneously promoting demineralization. Although this technique is effective on dentin, the acid is not strong enough to create micro retentions in enamel in the same way that phosphoric acid does.
- The infiltration of the dentin: Due to the structure of dentin and the presence of dentinal fluids, it is challenging for the “bond” of adhesive systems to penetrate dentin, as it is a hydrophobic material. For this reason, it is necessary for a hydrophilic material (the Primer) to penetrate the demineralized dentin region and subsequently copolymerize with the adhesive bond, creating the hybrid layer and the micromechanical retention required for adequate bond strength. With self-etch systems, the infiltration of dentin occurs as the acidic primer demineralizes the dentin hydroxyapatite.
- The bonding agent: The bonding agent, or “bond,” in multi-bottle adhesive systems, mechanically interlocks with the demineralized enamel and dentin. Upon polymerization, it forms the hybrid layer, a bio-composite structure at the interface between demineralized dentin, enamel, and the bonding agent. As a structure primarily composed of methacrylate, the hybrid layer establishes a chemical bond with methacrylate-based materials such as resin composites, flowable composites, and resin cement.
The adhesion strategies for each case will have some variables, such as whether the substrate will be enamel or dentin, which cement will be chosen for cementation, etc. Initially, it is necessary to classify the materials available on the market according to the type of conditioning they promote/require and the influence of this conditioning on the dental substrate. In this context, adhesives can be classified into: 1) total-etch adhesives, which require prior conditioning with phosphoric acid before applying the adhesive system; 2) self-etch adhesives, which contain an acidic primer in their composition that acts as the phosphoric acid, and finally, 3) universal adhesives (multi-mode), which can be used with the total-etch technique (with phosphoric acid conditioning) or self-etch (without phosphoric acid conditioning).
Total-Etch Adhesives: The total-etch strategy involves the use of 30%-40% phosphoric acid in a separate step, applied to the dental substrate for 15 to 30 seconds and then rinsed off. The effect of this acid etching is different when applied to enamel and dentin. Acid etching on enamel promotes selective dissolution of enamel prisms, creating microporosities that will be infiltrated by the adhesive. It is now well established that the adhesive procedure with acid etching on enamel followed by adhesive application is the most reliable adhesion procedure, presenting high success rates. Conversely, dentin, being composed of 50% inorganic matrix, 30% organic substance, and 20% water, has some particularities. In this case, acid etching acts differently and requires greater care. When performed, acid etching on dentin promotes demineralization of peritubular dentin, exposing a network of collagen fibers that will later be infiltrated by the adhesive. However, this network must not remain dry or be air-dried after acid etching, as this can collapse the collagen fiber network and inhibit adhesive infiltration. Additionally, the contact time between the acid and dentin should not exceed 15 seconds, as there is a risk of collagen fiber network destruction. For this reason, acid etching on dentin is one of the most technique-sensitive adhesive techniques.
For the total-etch strategy, adhesives are available in two presentations: two-bottle adhesives (separate primer and bond – 4th Generation) and single-bottle adhesives (Primer + Bond – 5th Generation). In these systems, the primer is a hydrophilic monomer that penetrates the collagen fibers of dentin (which, under normal conditions, contain water), facilitating bond penetration since adhesive bonds are hydrophobic. In enamel, which has a high mineral composition and therefore low water content, the function of the primer as an adhesion facilitator is unnecessary. In the case of the two-bottle adhesive, the application control of the primer and bond is greater; however, due to the increased number of steps, the technique becomes more sensitive and prone to operator errors.
Self-Etch Adhesives: Self-etch adhesives were introduced to address the technique sensitivity of dentin conditioning. With advancements in acidic monomers such as MDP (10-methacryloyloxydecyl dihydrogen phosphate), 6th Generation adhesives, available in two bottles (acidic primer and bond), promote primer penetration into dentin while simultaneously demineralizing it, reducing or almost eliminating the risk of collagen fiber network collapse. Besides simplifying the dentin conditioning technique, the bond strength results are comparable to more recent adhesive systems. These adhesives can also be used with the selective enamel conditioning technique, where phosphoric acid is applied only to enamel, and then the primer is applied to dentin. The bond is then applied to the entire substrate, increasing adhesion strength in enamel. Care must be taken when using selective enamel conditioning with these adhesives because they depend on the smear layer for good adhesion to dentin, and acid runoff onto dentin can reduce its adhesion.
To further simplify the adhesive technique, 7th Generation adhesives, or self-etch adhesives available in a single bottle, were introduced. These adhesives combine the acidic primer and bond in one device, simplifying their use; however, they demonstrate lower bond strength compared to two-bottle systems, which still provide the best results [34].
Universal Adhesives: Universal adhesives (8th Generation), also known as multi-mode adhesives, contain components in a single bottle that allow for the total-etch or self-etch technique, with or without selective enamel conditioning. A combination of hydrophobic and hydrophilic components enables multiple adhesive actions on different substrates. The ability to be used with any technique (total-etch or self-etch) eliminates the issue of self-etch adhesives not tolerating acid runoff onto dentin. Thus, if acid runoff occurs when using universal adhesives, no complications arise, minimizing operator errors.
Although these adhesives can be used with either the total-etch or self-etch technique, there is a consensus in the literature that selective enamel conditioning improves adhesion strength. However, the favorable effect of acid etching on enamel before applying these adhesives to dentin is still debated in the literature and may vary depending on the brand or acidity intensity of the functional monomer. Because these adhesives contain Primer and Bond in one bottle, they have a high amount of hydrophilic monomers and solvents, making it necessary to apply an air jet to evaporate these solvents for at least 15 seconds.
Although significant advancements have been achieved with more recent adhesive systems, the gold standard adhesives appear to have remained unchanged for years. It is essential to recognize that this outcome may be attributed to the extensive number of studies conducted on these adhesives, the lack of sufficient research on competing adhesives, or even the techniques employed in these studies. Based on the available scientific literature, it can still be stated that for the total-etch technique, the gold standard adhesive remains OptiBond FL (Kerr), while for the self-etch technique (with selective enamel etching), the gold standard adhesive is Clearfil SE Bond (Kuraray Noritake).
4.1. Gold Standard Technique for Total-Etch (Optibond FL)
After proper isolation of the operatory field, the substrate that will receive the bonding protocol should follow the mechanical cleaning and roughening protocol or follow the APA protocol. Following:
- Selective enamel etching with 30% to 40% phosphoric acid gel should be applied for a period of 15 seconds. After this period, apply the acid to the dentin surface for 10-15 seconds (maximum)* (Figure 8A and 8B).
- Thoroughly water rinse for 10-15 seconds and air dry the enamel surface. Dentin should be shortly air-dried only to remove visible water.
- Activaly rub the primer on the dentin surface for at least 15 seconds*. Extra application or extra time with rubbing the primer is always welcome (Figure 8C).
- Gently air-dry the primer for at least 15 seconds to evaporate solvents* (Figure 8D).
- Apply the “bond” on all etched surfaces, ideally with a fiber-free micro brush (Figure 8E).
- With a gently air blow and sucction, remove the excess while uniformly spread the adhesive resin (Figure 8F).
- Photopolymerize for 40 seconds.
*Only if dentin is exposed
4.2. Gold Standard Technique for Self-Etch (Clearfil SE)
After proper isolation of the operatory field, the substrate that will receive the bonding protocol should follow the mechanical cleaning and roughening protocol or follow the APA protocol. Following:
- Selective enamel etching with 30% to 40% phosphoric acid gel should be applied for 15-30 seconds (Figure 9A).
- Thoroughly water rinse for 10-15 seconds and air dry.
- Activaly rub the primer on the dentin surface for at least 15 seconds*. Extra application or extra time with rubbing the primer is always welcome (Figure 9B).
- Gently air-dry the primer for at least 15 seconds to evaporate solvents* (Figure 9C).
- Apply the “bond” on all etched surfaces, ideally with a fiber-free micro brush (Figure 9D).
- With a gently air blow and sucction, remove the excess while uniformly spread the adhesive resin (Figure 9E).
- Photopolimerize for 40 seconds.
*Only if dentin is exposed
Tip: Caution must be exercised when cementing indirect restorations, as a thick layer of photoactivated adhesive may hinder the proper fit of the restoration. To avoid this problem, air thinning should be performed before polymerization, or polymerization should be carried out after positioning the restoration with the chosen cement.
4.3. Different Approaches to Different Clinical Situations
Small changes in clinical approach can be made depending on the type of restoration being performed. The time and method for achieving better adhesion can differ between direct and indirect restorations. As mentioned before in this article, the best time to make an adhesive procedure on dentin is at the moment of preparation. This can be an advantage of direct or chairside restorations since the adhesive procedure and the restoration will be performed consecutively. For indirect restorations (onlays, inlays, overlays, and crowns), the final restoration has to be made in the lab, hence there will be a provisional restoration to cover the prepared surface and the final adhesion is only made when the indirect restoration arrives from the lab. This is a downside for indirect restorations since during the provisional phase the exposed dentin can be contaminated and if not treated properly upon cementation, bond strength may be reduced drastically.
To mitigate these problems, immediate dentin sealing (IDS) may be performed to secure the bond strength at the moment of preparation for indirect restorations. The IDS goal is to make an adhesive procedure right after the dentin preparation and seal the dentin with a filled bonding agent or a flowable composite [17,18]. This will ensure that the best adhesion on dentin is performed at the correct time, preventing dentin contamination (Figure 10).
IDS is an excellent procedure for indirect restorations on the posterior tooth or with dental crowns and with the advantage of intra-oral scanners the digital impression can be made right after IDS while the tooth is still under a rubber dam. This technique, described by Victor Clavijo [35,36] aims to reduce clinical time while ensuring the best operative site for digital impressions. The main challenges of using intra-oral scanners include the presence of fluids that can cause distortions in the scan and difficulties with tissue retraction, the scanner can only copy what it can see. Rubber dam isolation provides an operative site with optimal tissue retraction and no fluids, allowing for the digital impression to perform effectively. An effective approach for indirect restorations involves rubber dam isolation, followed by the removal of carious lesions, unsatisfactory restorative materials, or provisionals after endodontic treatment. This is then followed by immediate dentin sealing (IDS), preparing for the desired restoration thickness, and finally, the intra-oral scan. Figure 12, Figure 13 and Figure 14.
The primary drawback of the IDS technique occurs when preparation cannot be performed under rubber dam isolation. Laminate veneers are an example where IDS may be ineffective. Due to the necessity of performing preparation with a mock-up in place [37], controlling dental preparation using silicone guides, and consistently viewing the gingival margins, it is impractical to carry out preparation under a rubber dam and follow it with IDS. One alternative might be to complete the dental preparation and then perform rubber dam isolation. The main issue with this alternative is that the preparation for laminate veneers is precisely calculated to avoid unnecessary removal of dental tissue; therefore, there would be no space to perform IDS. Consequently, the clinician would need to deepen the preparation where dentin is present to create space for IDS without compromising the restoration thickness.
5. Conclusions
A well-established clinical protocol involving not only the adhesion material selection but also how to create a proper operative site free of contaminants and how to properly clean and prepare the dental substrate is paramount for achieving the best results in dental adhesion. Despite the development of simplified adhesive systems that offer acceptable bond strength results, the gold standard continues to deliver superior and predictable outcomes. Great adhesion results do not depend only on the adhesive material itself but on a synergistic approach involving operative site isolation, substrate cleaning and treatment, and protocol fidelity. When these elements are correctly applied, they significantly enhance the reliability of dental adhesion for both direct and indirect restorations, contributing to improved restorative longevity.
Author Contributions
Conceptualization: M.V.; A.A.; C.N.L.M.; V.G.R.C.; A.S.T.; D.M.V.V.; methodology: M.V.; A.A.; V.G.R.C.; A.S.T.; D.M.V.V.; formal analysis: M.V.; A.A.; investigation: M.V.; A.A.; data curation: M.V.; writing—original draft preparation: M.V.; A.A.; C.N.L.M.; L.C.B.M.; V.G.R.C. and R.M.; writing—review and editing: M.V.; A.A.; C.N.L.M.; L.C.B.M.; V.G.R.C. and R.M.; visualization: M.V.; A.A.; C.N.L.M.; L.C.B.M.; V.G.R.C.; D.M.V.V. and R.M.; supervision: C.N.L.M.; project administration: C.N.L.M.; funding acquisition: C.N.L.M. All authors have read and agreed to the published version of the manuscript.
Funding
The authors acknowledge the funding from the National Council for Scientific and Technological Development (CNPq).
Conflicts of Interest
The authors declare no conflicts of interest.
References
- Peumans, M.; De Munck, J.; Mine, A. & Van Meerbeek, B. Clinical effectiveness of contemporary adhesives for the restoration of non-carious cervical lesions. A systematic review. Dental Materials 2014, 30, 1089–1103. [Google Scholar] [CrossRef] [PubMed]
- De Munck, J.; et al. Meta-analytical review of parameters involved in dentin bonding. Journal of Dental Research 2012, 91, 351–357. [Google Scholar] [CrossRef] [PubMed]
- Pashley, D. H.; et al. State of the art etch-and-rinse adhesives. Dental Materials 2011, 27, 1–16. [Google Scholar] [CrossRef] [PubMed]
- Van Meerbeek, B.; Yoshihara, K.; Van Landuyt, K.; Yoshida, Y. & Peumans, M. From Buonocore’s Pioneering Acid-Etch Technique to Self-Adhering Restoratives. A Status Perspective of Rapidly Advancing Dental Adhesive Technology. J Adhes Dent 2020, 22, 7–34. [Google Scholar]
- Jacquot, B.; Durand, J.-C.; Farge, P.; Valcarcel, J. & Deville, D. Influence of Temperature and Relative Humidity on Dentin and Enamel Bonding: A Critical Review of the Literature. Part 1. Laboratory Studies. J Adhes Dent 2020, 14, 433–446. [Google Scholar]
- Caviglia, N. A.; Urzagaste, O. A.; Siqueira, P. C.; Decurcio, R. de A. & Decurcio, D. de A. Determinação da umidade relativa do campo operatório com isolamento absoluto, modificado e relativo – estudo piloto. Revista Odontológica do Brasil Central 2020, 29. [Google Scholar]
- Chaiyabutr, Y. & Kois, J. C. The effect of tooth-preparation cleansing protocol on the bond strength of self-adhesive resin cement to dentin contaminated with a hemostatic agent. Oper Dent 2011, 36, 18–26. [Google Scholar]
- Jeon, B. K.; et al. Effect of etching procedures on the adhesion of biofilm-coated dentin. Materials 2020, 13, 1–11. [Google Scholar] [CrossRef]
- Kuphasuk, W.; Harnirattisai, C.; Senawongse, P. & Tagami, J. Bond strengths of two adhesive systems to dentin contaminated with a hemostatic agent. Oper Dent 2007, 32, 399–405. [Google Scholar]
- Aboushelib, M. N. Clinical performance of self-etching adhesives with saliva contamination. J Adhes Dent 2011, 13, 489–93. [Google Scholar]
- Barnum, S. C. Rubber or Coffer Dam. Am J Dent Sci 1867, 1, 49–50. [Google Scholar]
- Prime, J. M. ‘Fifty-seven’ Reasons For using Rubber Dam. The Illinois Dental Journal 1938.
- Browet, S. & Gerdolle, D. Precision and security in restorative dentistry: the synergy of isolation and magnification. Int J Esthet Dent 2017. [Google Scholar]
- Mendonça, E.; Vieira, S.; Kawaguchi, F.; Powers, J. & Matos, A. Influence of blood contamination on bond strength of a self-etching system. Eur J Dent 2010, 4. [Google Scholar]
- Sharafeddin, F. & Farhadpour, H. Evaluation of Shear Bond Strength of Total- and Self-etching Adhesive Systems after Application of Chlorhexidine to Dentin Contaminated with a Hemostatic Agent. J Dent (Shiraz) 2015, 16, 175–81. [Google Scholar]
- Hardan, L.; et al. The bond strength and antibacterial activity of the universal dentin bonding system: A systematic review and meta-analysis. Microorganisms 2021, 9. [Google Scholar] [CrossRef]
- Magne, P. Immediate Dentin Sealing: A Fundamental Procedure for Indirect Bonded Restorations. Journal of Esthetic and Restorative Dentistry 2006, 17, 144–154. [Google Scholar] [CrossRef]
- de Carvalho, M. A.; Lazari-Carvalho, P. C.; Polonial, I. F.; de Souza, J. B. & Magne, P. Significance of immediate dentin sealing and flowable resin coating reinforcement for unfilled/lightly filled adhesive systems. Journal of Esthetic and Restorative Dentistry 2021, 33, 88–98. [Google Scholar]
- Kui, A.; et al. Air Particle Abrasion in Dentistry: An Overview of Effects on Dentin Adhesion and Bond Strength. Dent J (Basel) 2024, 13, 16. [Google Scholar] [CrossRef]
- Ferrazzano, G. F.; Iodice, G.; Cantile, T. & Ingenito, A. Scanning electron microscopic study of air abrasion effects on human dentine. Eur J Paediatr Dent 2007, 8, 113–8. [Google Scholar]
- Freeman, R.; Varanasi, S.; Meyers, I. A. & Symons, A. L. Effect of air abrasion and thermocycling on resin adaptation and shear bond strength to dentin for an etch-and-rinse and self-etch resin adhesive. Dent Mater J 2012, 31, 180–188. [Google Scholar] [PubMed]
- Eshghi, A.; Khoroushi, M. & Rezvani, A. Resin bonding using etch-and-rinse and self-etch adhesives to decalcified deciduous enamel after bioactive glass air abrasion. J Contemp Dent Pract 2014, 15, 595–602. [Google Scholar] [PubMed]
- Souza-Zaroni, W. C.; et al. Adhesion of a self-etching system to dental substrate prepared by Er:YAG laser or air abrasion. J Biomed Mater Res B Appl Biomater 2008, 86, 321–329. [Google Scholar] [CrossRef]
- Azeredo Alves Antunes Rafael Lima Pedro Áurea Simone Barrôso Vieira, L Pediatric Dentistry Effectiveness of High Speed Instrument and Air Abrasion on Different Dental Substrates Pediatric Dentistry. Braz Oral Res 2008, 22.
- Buonocore, M.G. A Simple Method of Increasing the Adhesion of Acrylic Filling Materials to Enamel Surfaces. J Dent Res 1955, 34, 849–853. [Google Scholar] [CrossRef]
- Zhu, J. J.; Tang, A. T. H.; Matinlinna, J. P. & Hägg, U. Acid etching of human enamel in clinical applications: a systematic review. J Prosthet Dent 2014, 112, 122–35. [Google Scholar]
- Tsujimoto, A.; et al. Effect of Reduced Phosphoric Acid Pre-etching Times on Enamel Surface Characteristics and Shear Fatigue Strength Using Universal Adhesives. J Adhes Dent 2017, 19, 267–275. [Google Scholar]
- Van Meerbeek, B.; Yoshihara, K.; Van Landuyt, K.; Yoshida, Y. & Peumans, M. From Buonocore’s Pioneering Acid-Etch Technique to Self-Adhering Restoratives. A Status Perspective of Rapidly Advancing Dental Adhesive Technology. J Adhes Dent 2020, 22, 7–34. [Google Scholar]
- Bernales Sender, F. R.; Castañeda Vía, J. A. & Tay, L. Y. Influence of different phosphoric acids before application of universal adhesive on the dental enamel. Journal of Esthetic and Restorative Dentistry 2020, 32, 797–805. [Google Scholar]
- Lima, A. F.; et al. Influence of previous acid etching on interface morphology and bond strength of self-etching adhesive to cavosurface enamel. Eur J Dent 2012, 6, 56–62. [Google Scholar] [CrossRef]
- Foscaldo, T.; et al. Effect of HEMA Phosphate as an Alternative to Phosphoric Acid for Dentin Treatment Prior to Hybridization with Etch-and-Rinse Adhesive Systems. J Adhes Dent 2016, 18, 425–434. [Google Scholar] [PubMed]
- De Munck, J.; et al. Meta-analytical review of parameters involved in dentin bonding. J Dent Res 2012, 91, 351–7. [Google Scholar] [CrossRef] [PubMed]
- Nakabayashi, N.; Kojima, K. & Masuhara, E. The promotion of adhesion by the infiltration of monomers into tooth substrates. J Biomed Mater Res 1982, 16, 265–73. [Google Scholar] [PubMed]
- Cardoso, M. V.; et al. Current aspects on bonding effectiveness and stability in adhesive dentistry. Aust Dent J 2011, 56, 31–44. [Google Scholar] [CrossRef]
- Clavijo, V. & Duarte, S. Digital scan over dental dam: workflow for successful clinical outcome. Quintessence Int (Berl) 2021, 51, 660–665. [Google Scholar]
- Henarejos-Domingo, V.; Clavijo, V.; Blasi, Á.; Madeira, S. & Roig, M. Digital scanning under rubber dam: An innovative method for making definitive impressions in fixed prosthodontics. Journal of Esthetic and Restorative Dentistry 2021, 33, 976–981. [Google Scholar]
- MAGNE, P. & BELSER, U. C. Novel Porcelain Laminate Preparation Approach Driven by a Diagnostic Mock-up. Journal of Esthetic and Restorative Dentistry 2004, 16, 7–16. [Google Scholar]
Figure 1.
The optimal condition for adhesive procedures. Low humidity, no saliva or blood and good visualization of the operative site.
Figure 1.
The optimal condition for adhesive procedures. Low humidity, no saliva or blood and good visualization of the operative site.
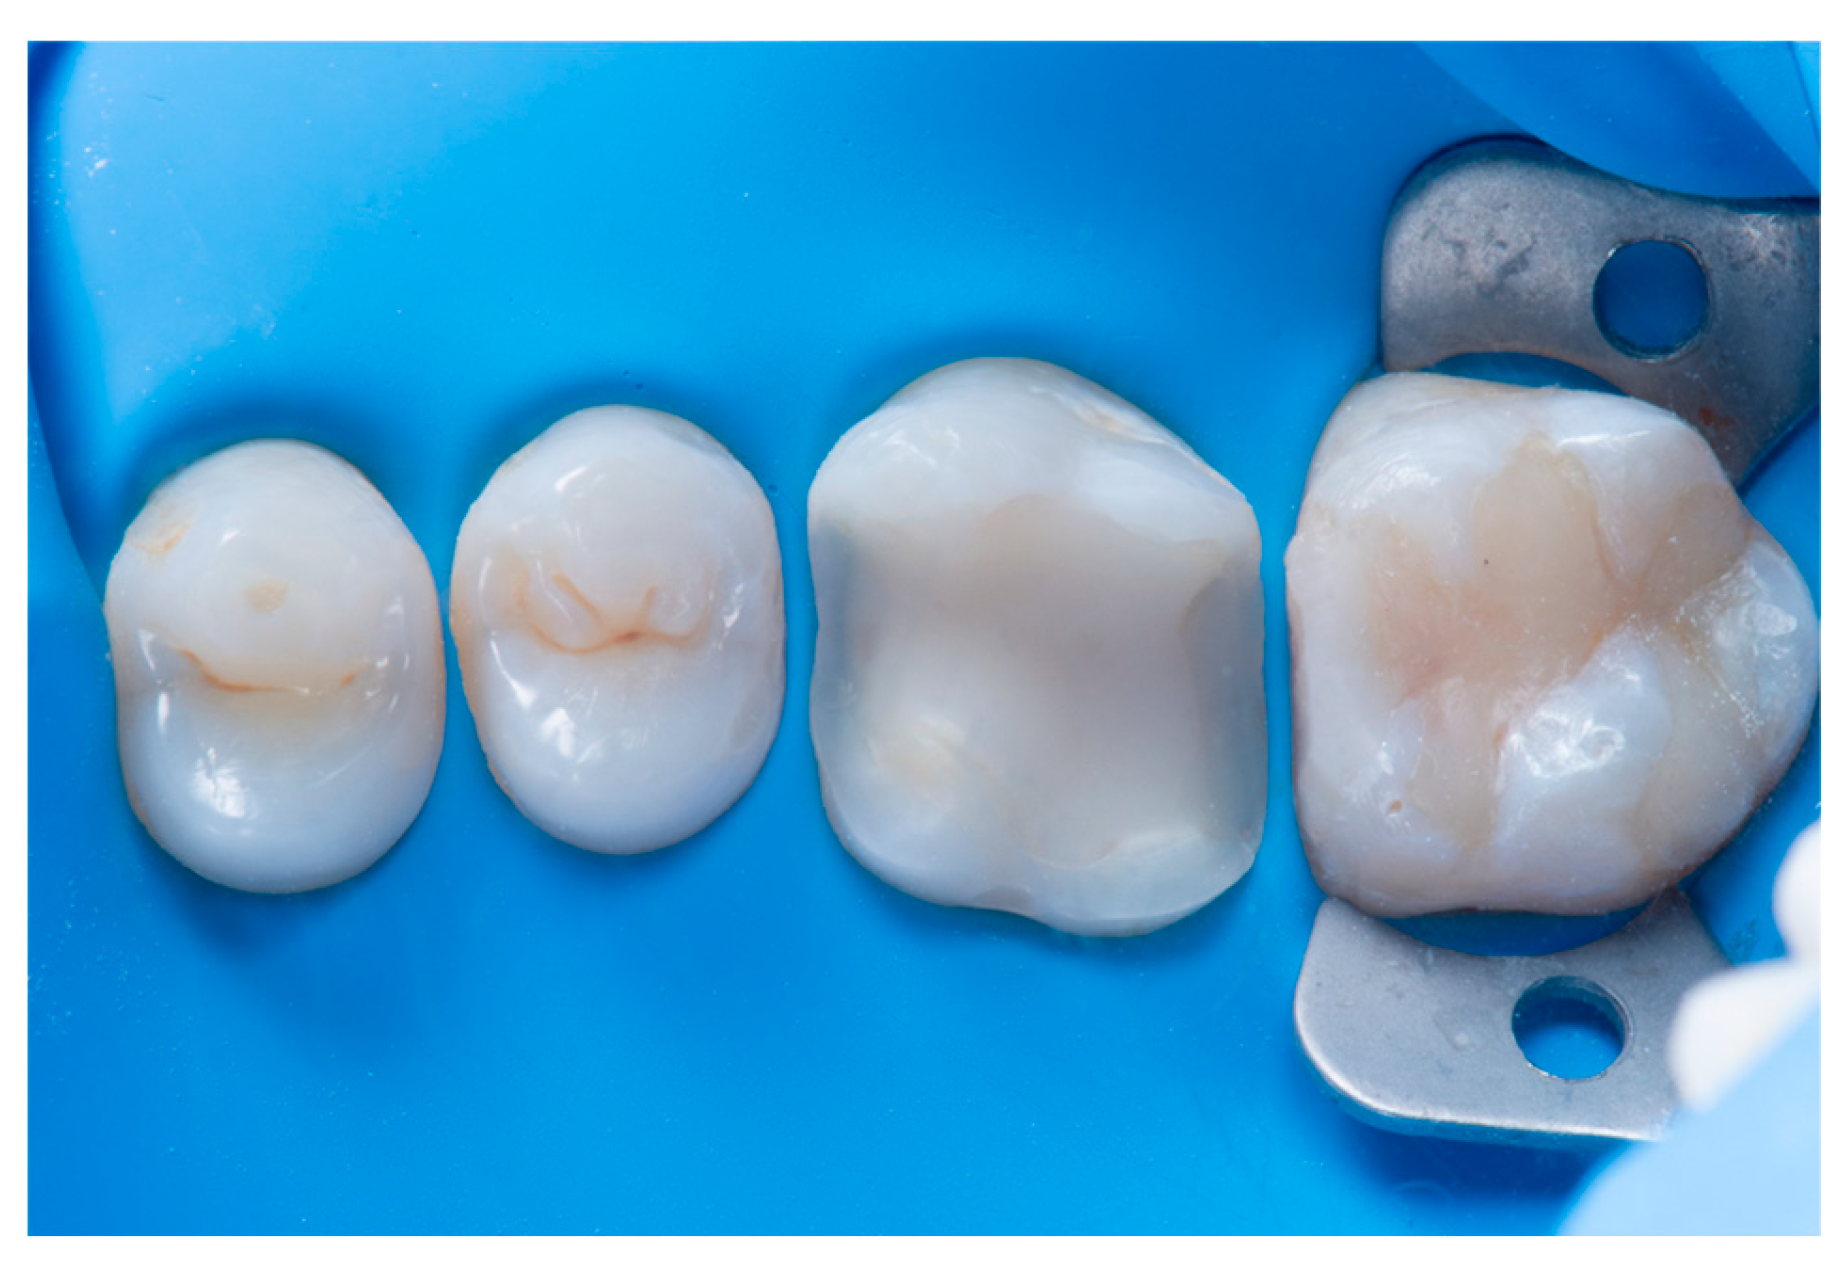
Figure 2.
Example of two rubber dam sheets, Nic Tone (blue) and Flexi Dam (purple).
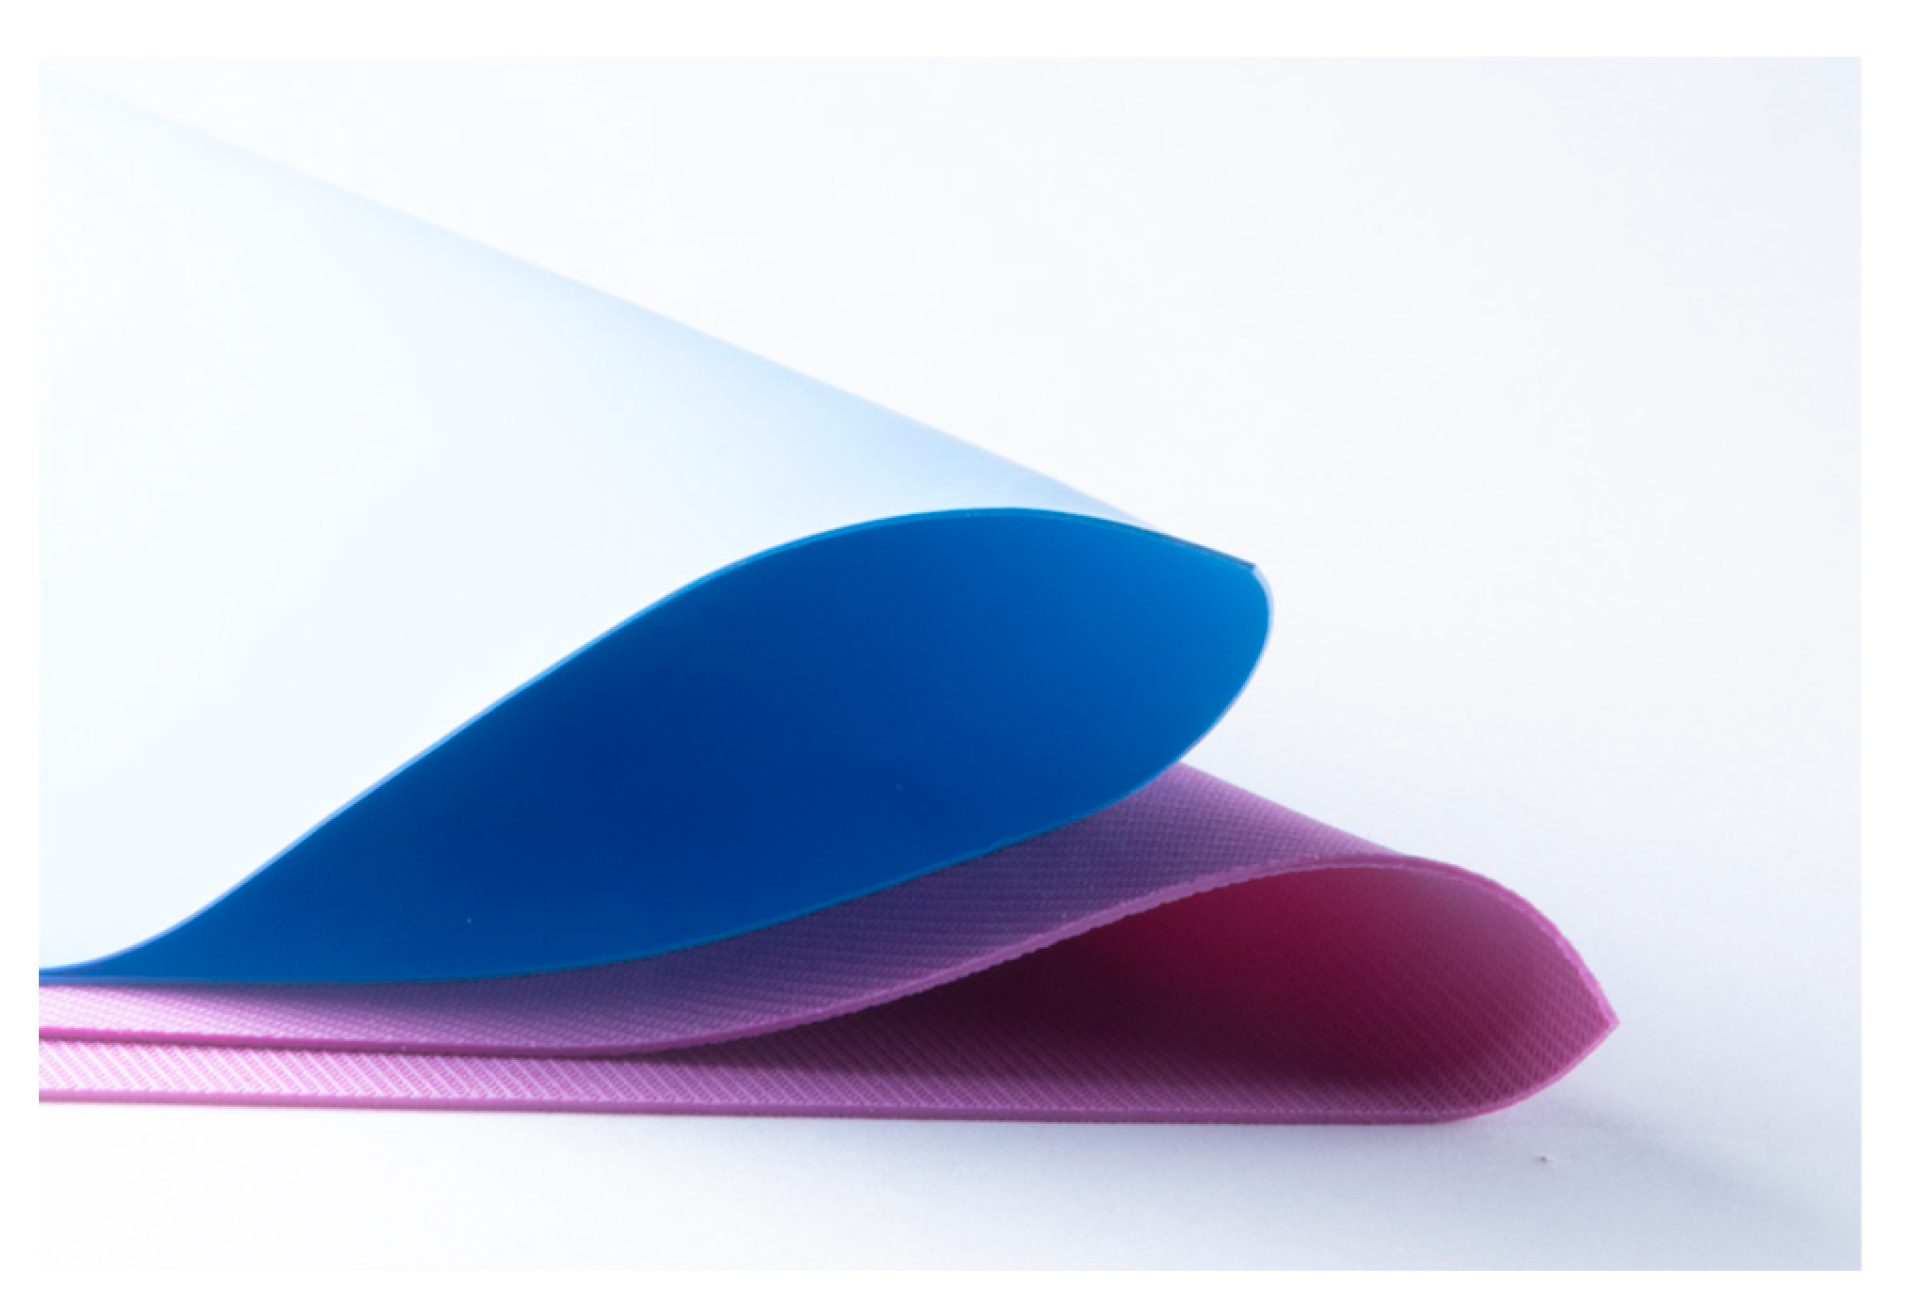
Figure 3.
The image on the left show an increased distance between the molar and the pre-molar markings due to the presence of diastema. The image on the right is post rubber dam isolation, notice the proper settlement of the sheet in the diastem area.
Figure 3.
The image on the left show an increased distance between the molar and the pre-molar markings due to the presence of diastema. The image on the right is post rubber dam isolation, notice the proper settlement of the sheet in the diastem area.
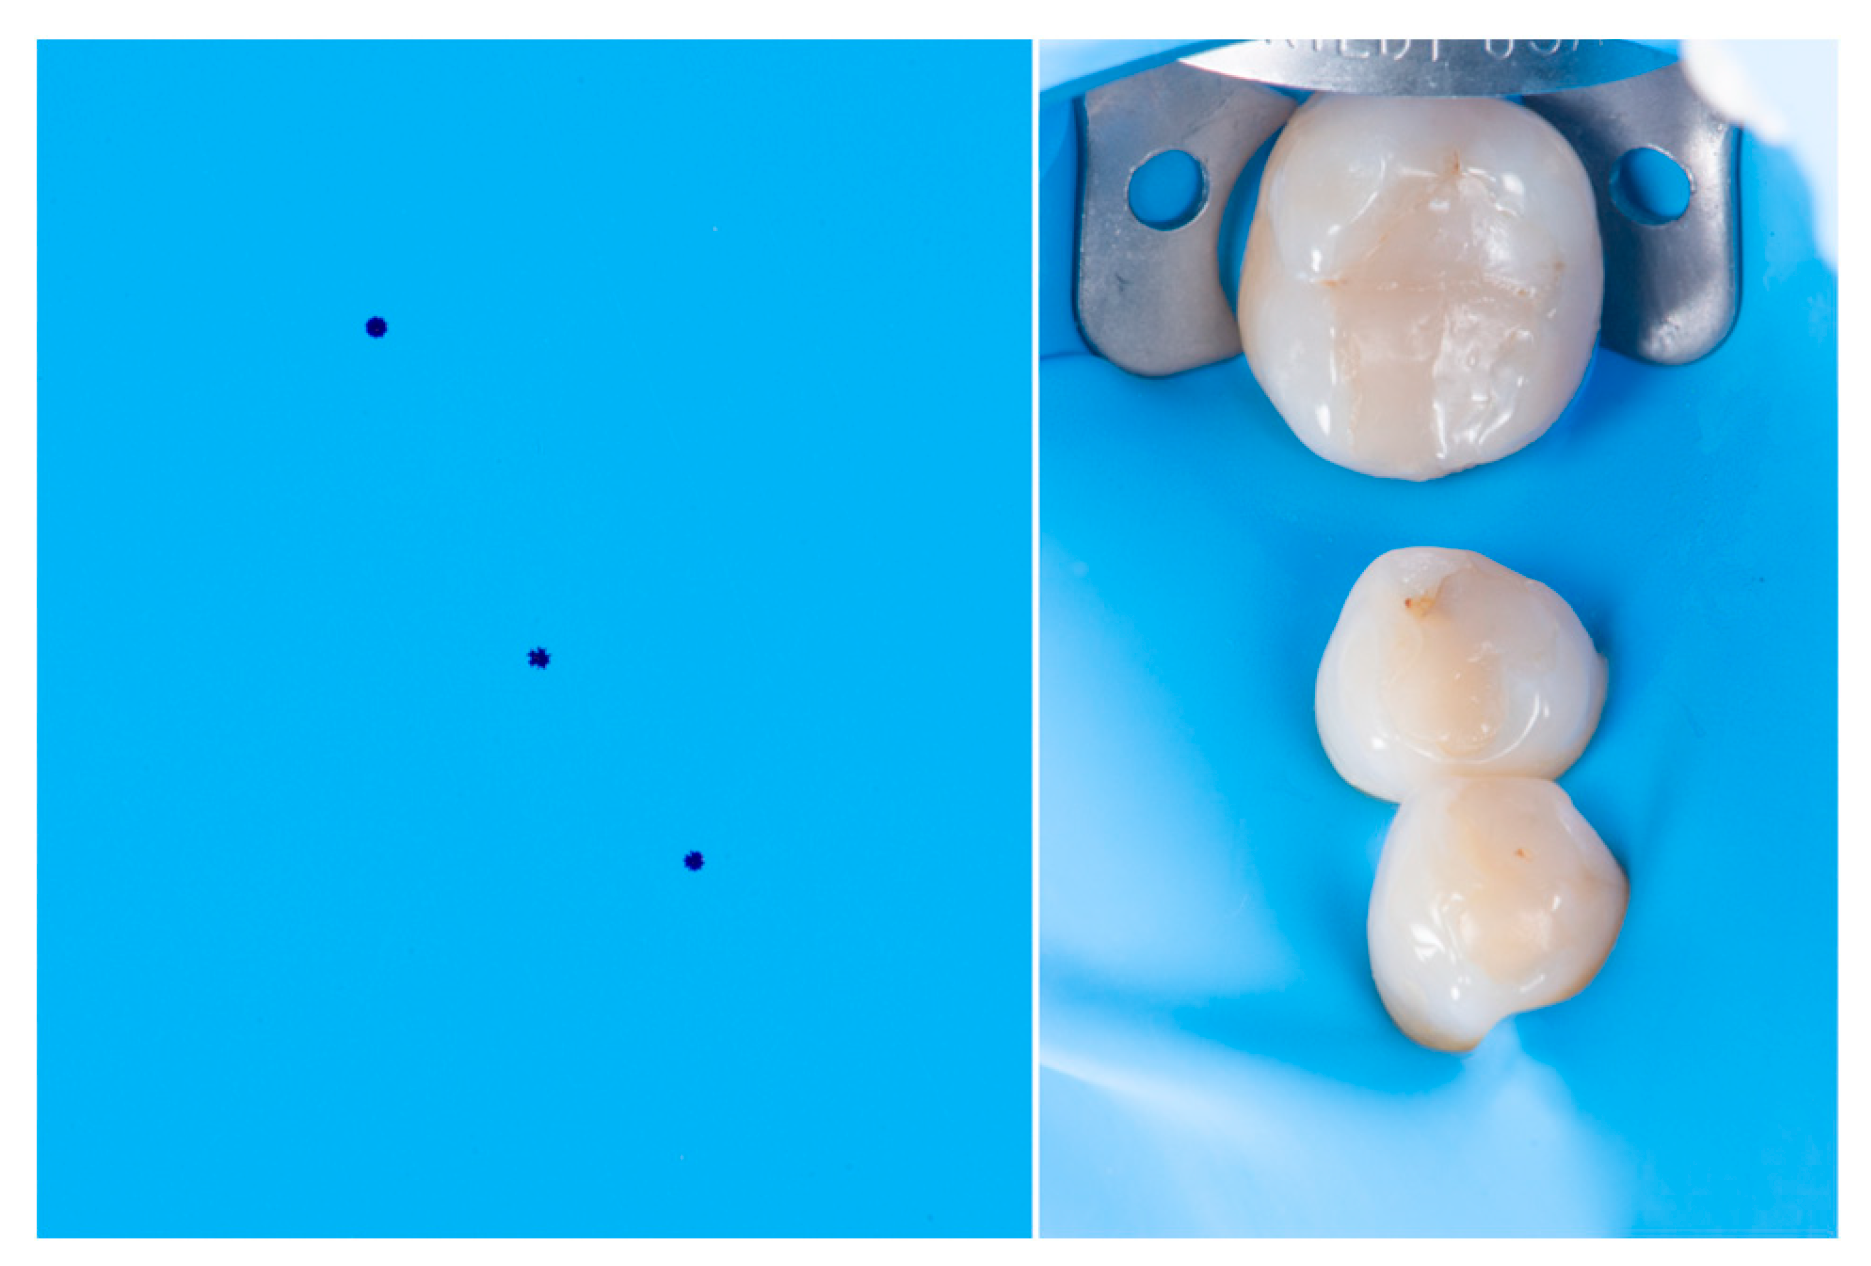
Figure 4.
An example of auxiliary clamps with flowable composite stabilization.
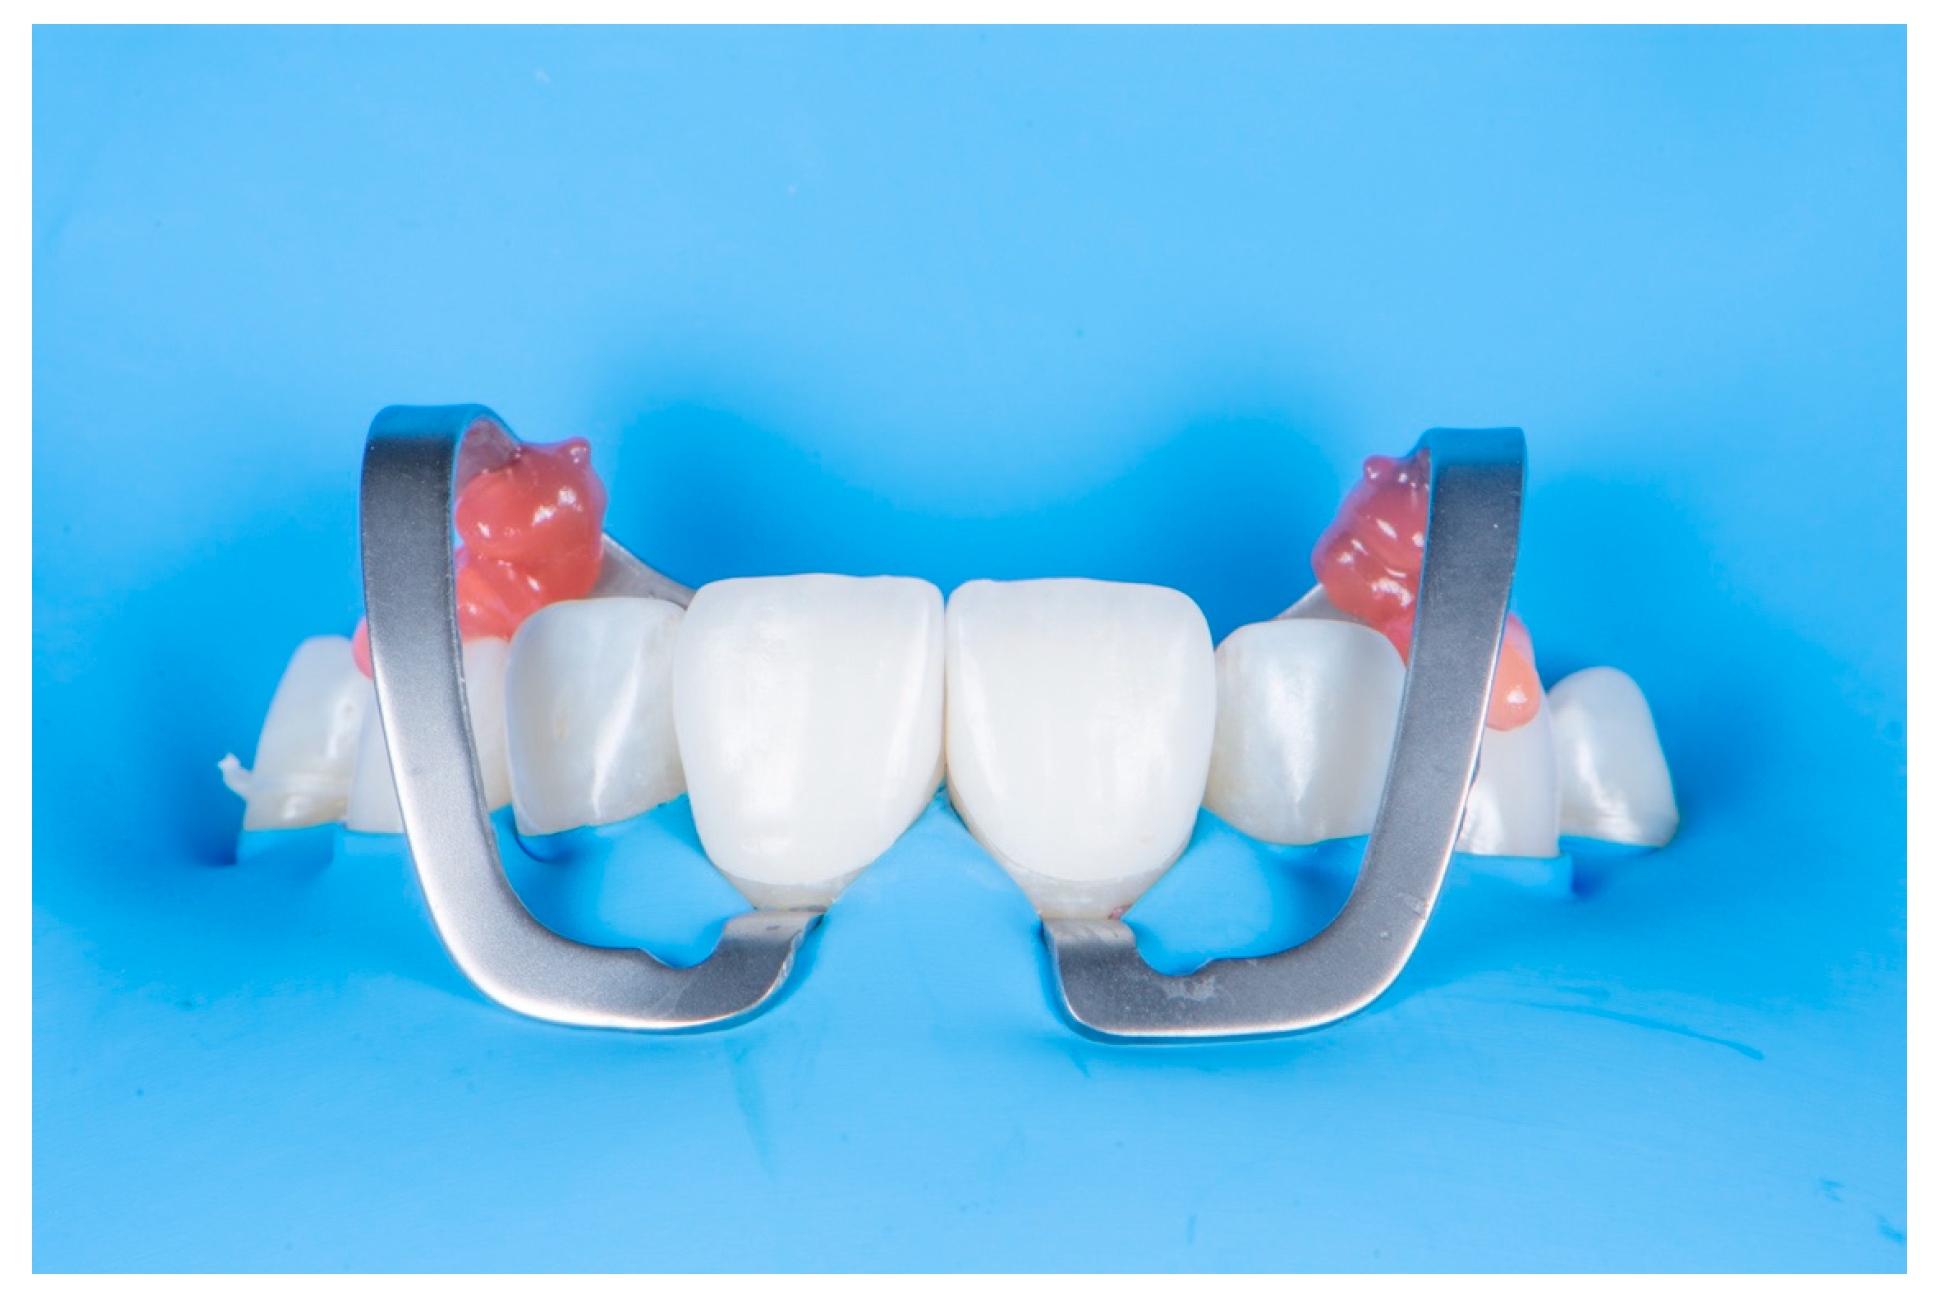
Figure 5.
Mechanical cleaning with a fine tip brush.
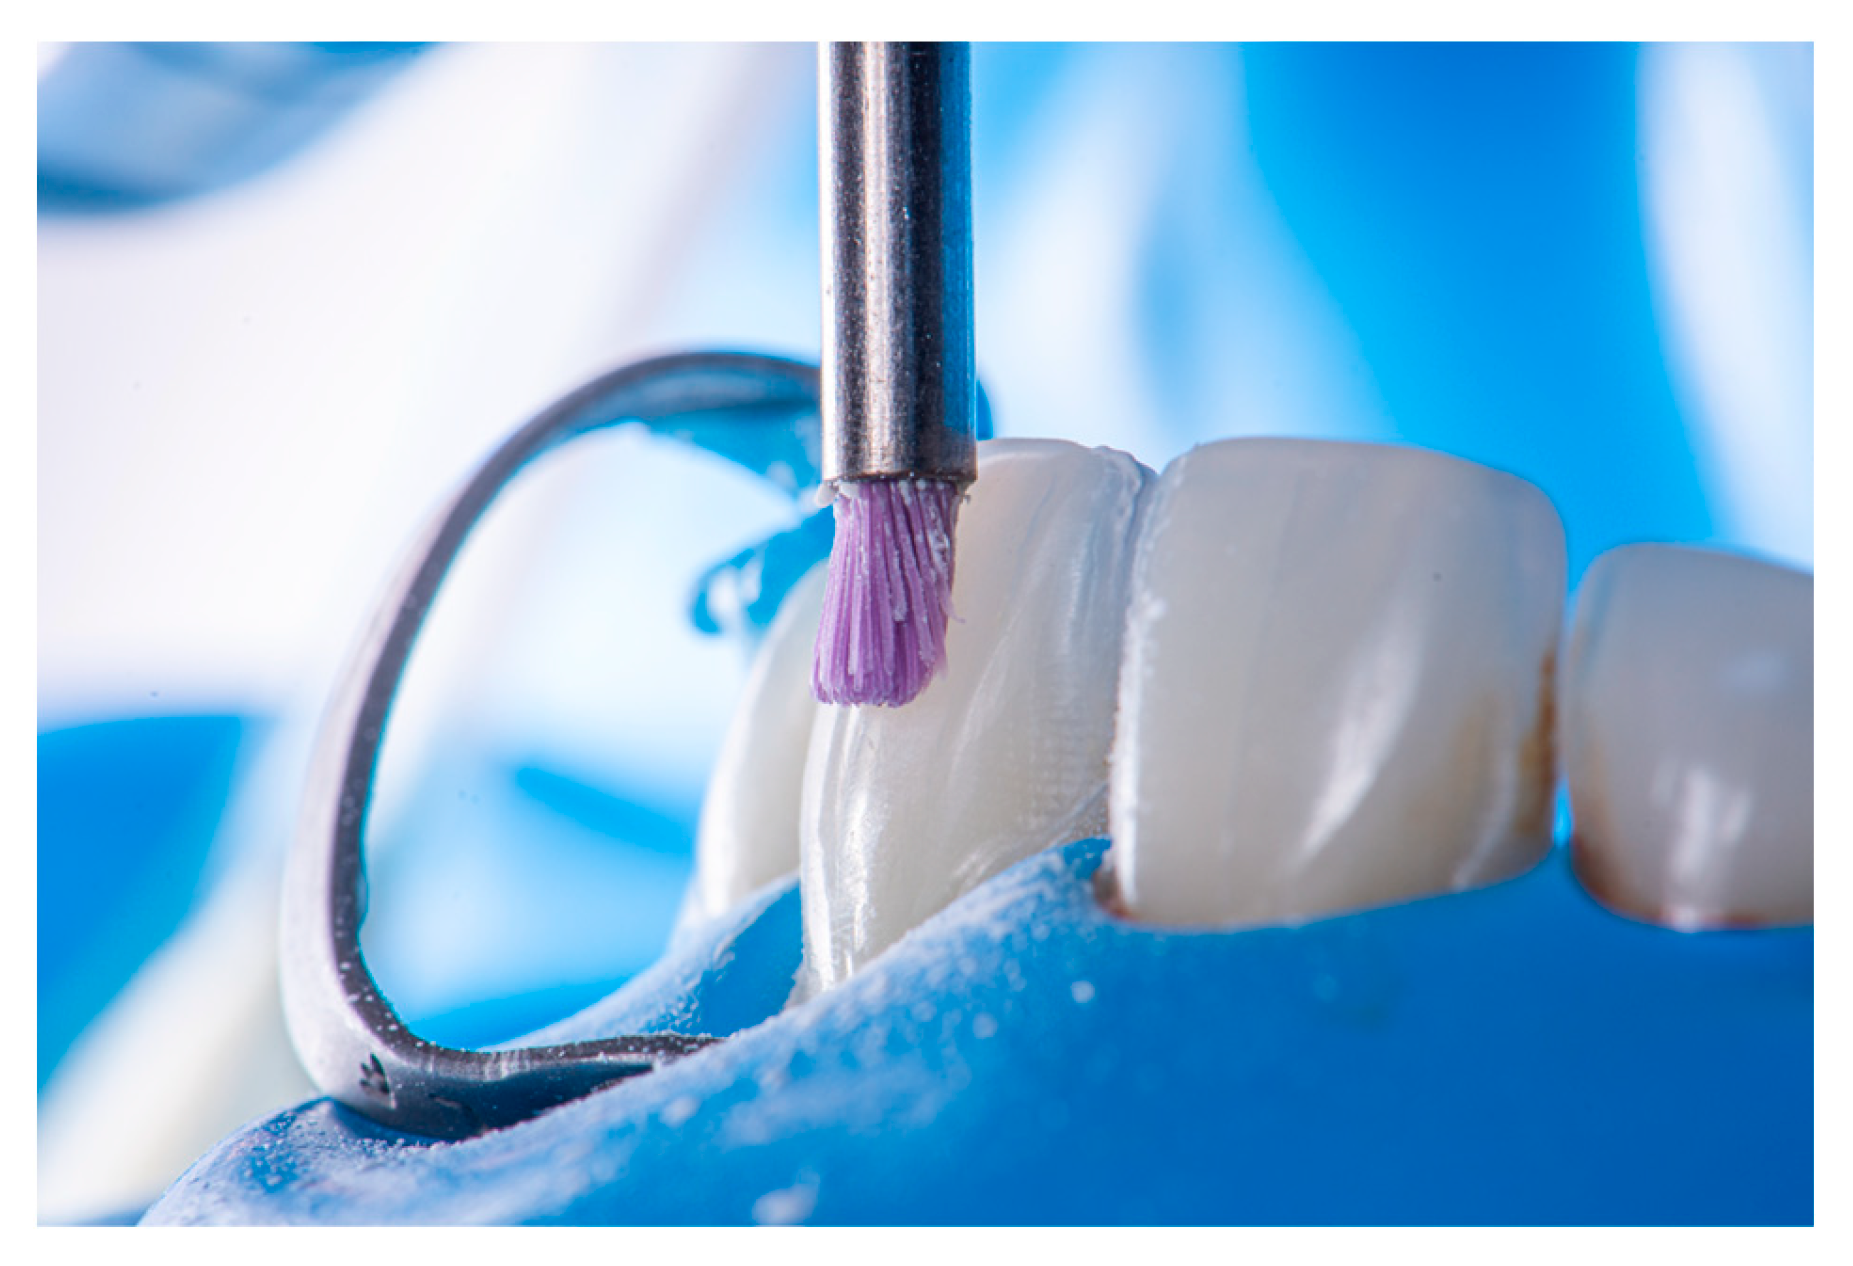
Figure 6.
Dentin roughening with carbide bur.

Figure 7.
The left image shows a rubber dam isolated tooth with contaminated surface. The image on the right shows the clean surface after APA cleaning.
Figure 7.
The left image shows a rubber dam isolated tooth with contaminated surface. The image on the right shows the clean surface after APA cleaning.
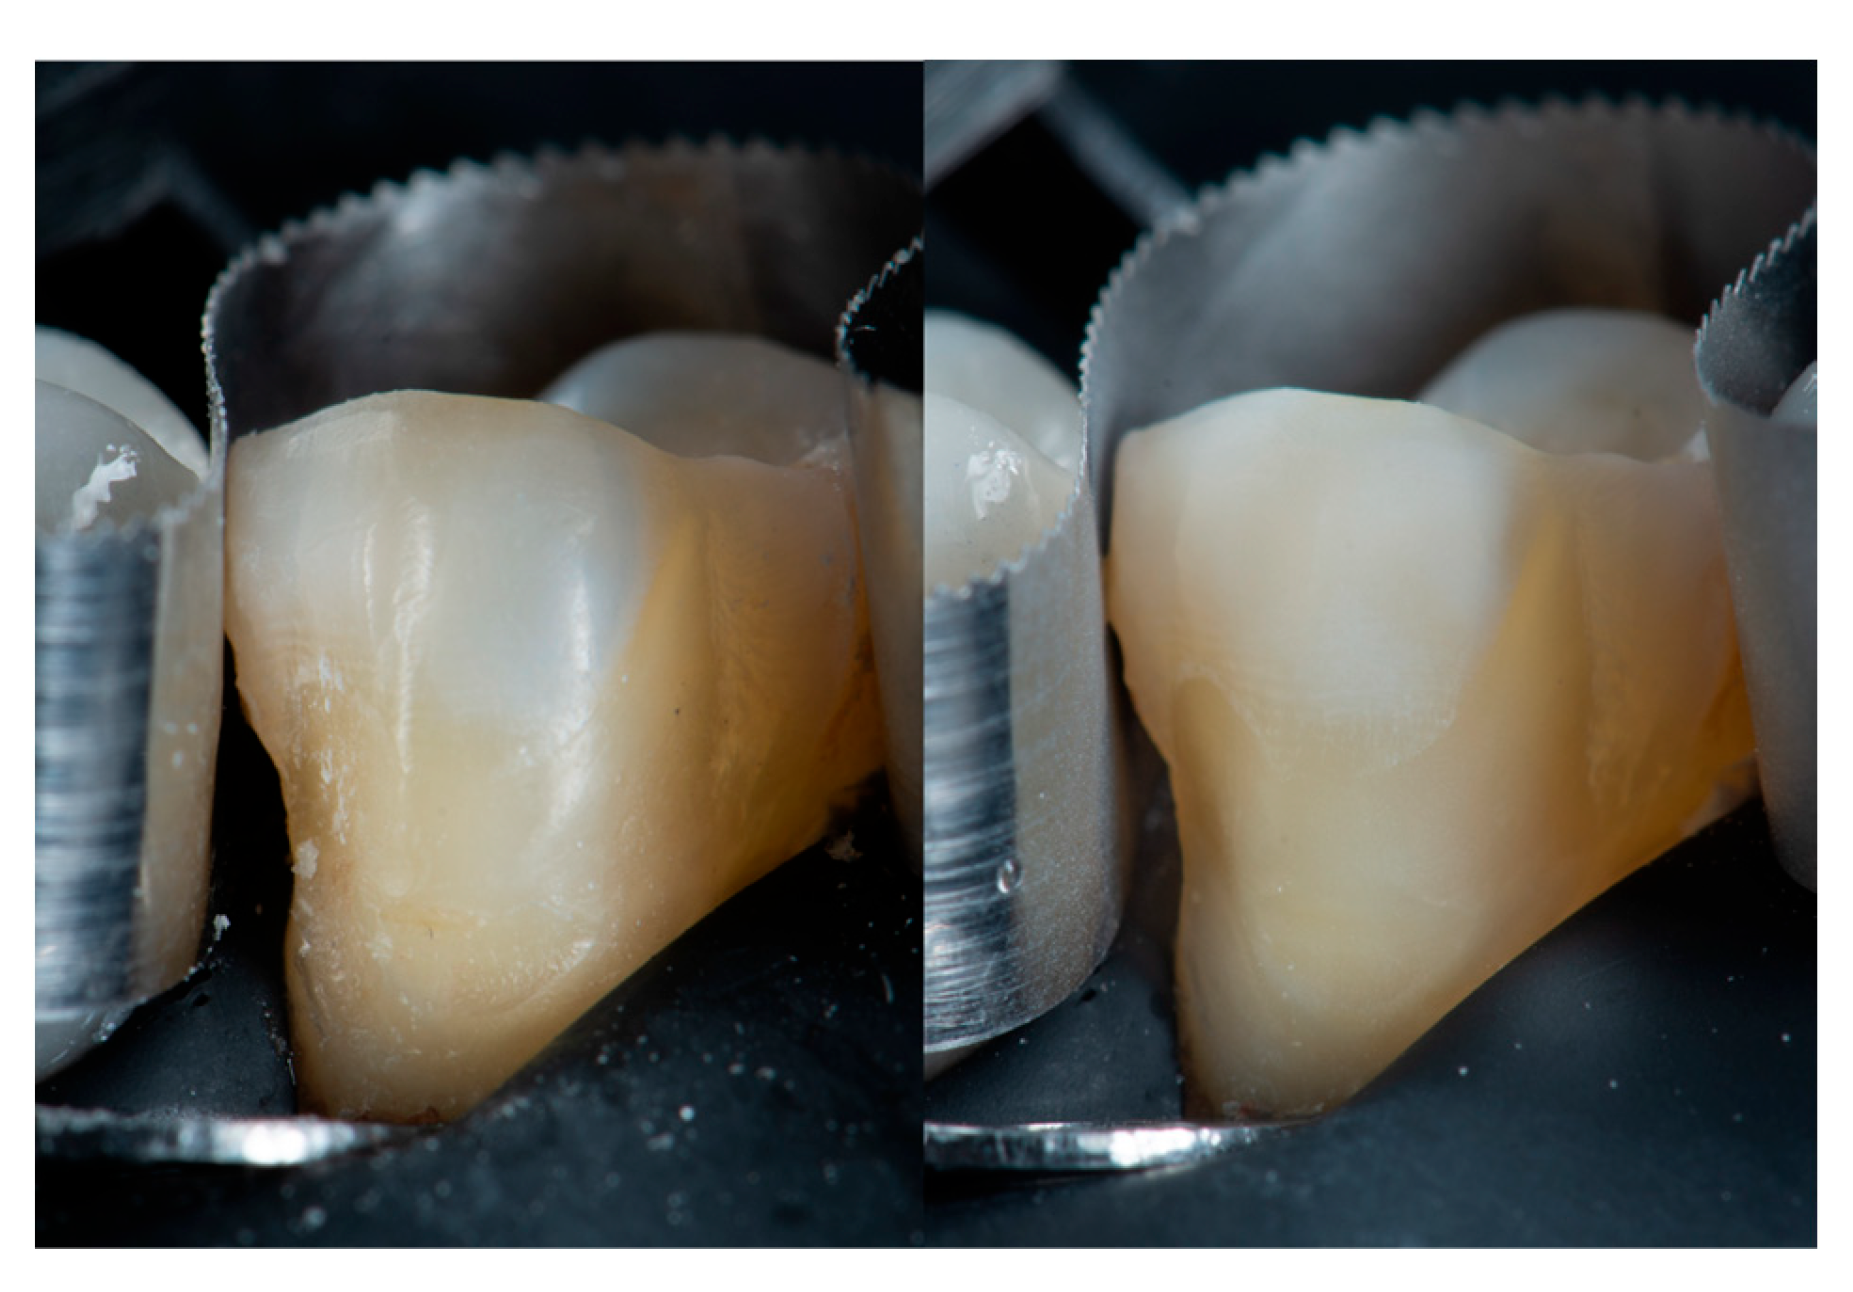
Figure 8.
Illustration of the total-etch technique. (A) Selective enamel etching. (B) Total etch. (C) Primer application. (D) Solvent evaporation. (E) Bond application. (F) Excess removal.
Figure 8.
Illustration of the total-etch technique. (A) Selective enamel etching. (B) Total etch. (C) Primer application. (D) Solvent evaporation. (E) Bond application. (F) Excess removal.
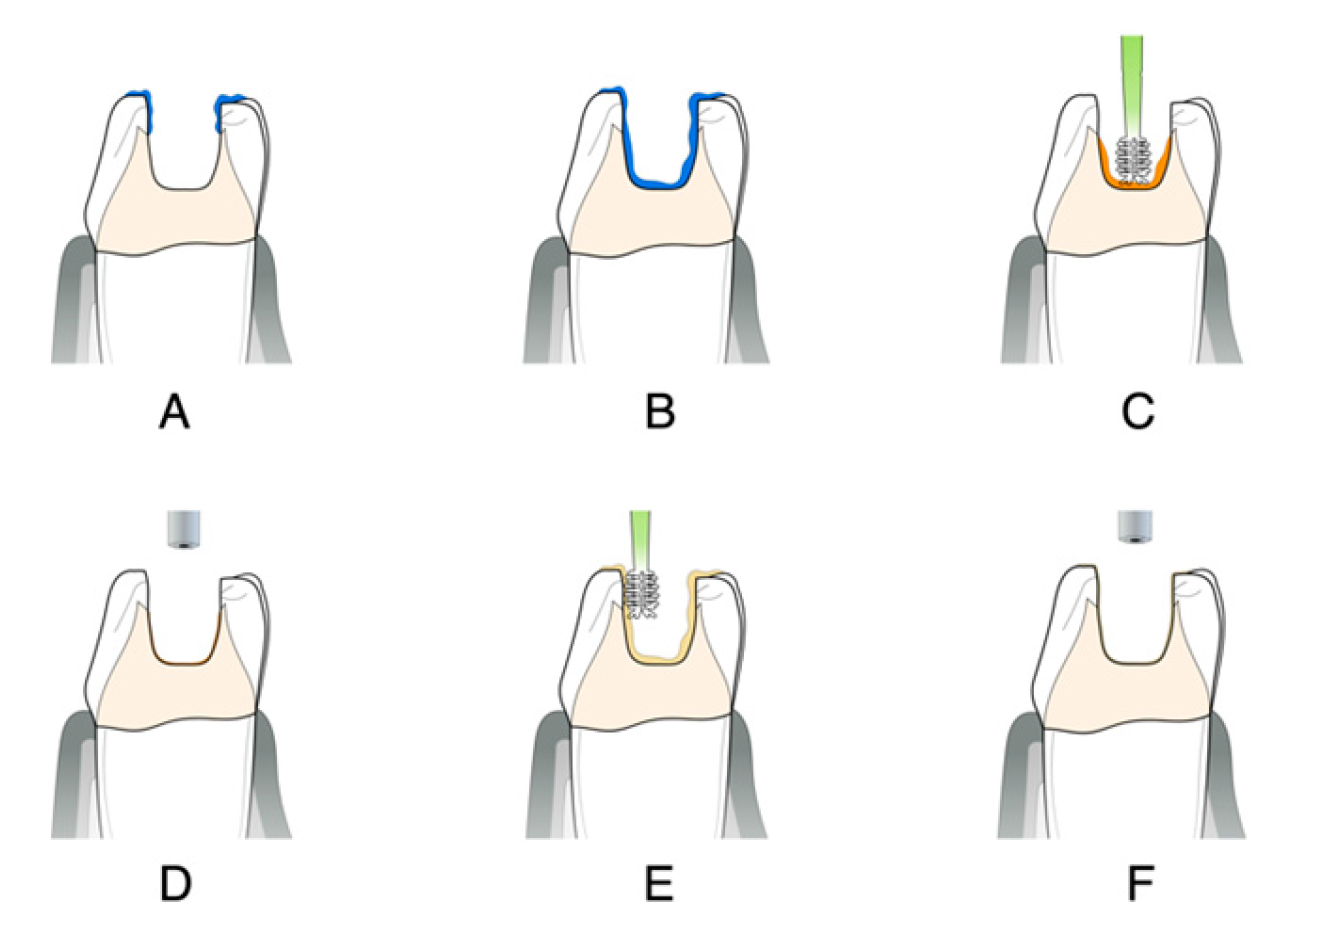
Figure 9.
Illustration of the self-etch technique. (A) Selective enamel etching. (B) Primer application. (C) Solvent evaporation. (D) Bond application. (E) Excess removal.
Figure 9.
Illustration of the self-etch technique. (A) Selective enamel etching. (B) Primer application. (C) Solvent evaporation. (D) Bond application. (E) Excess removal.
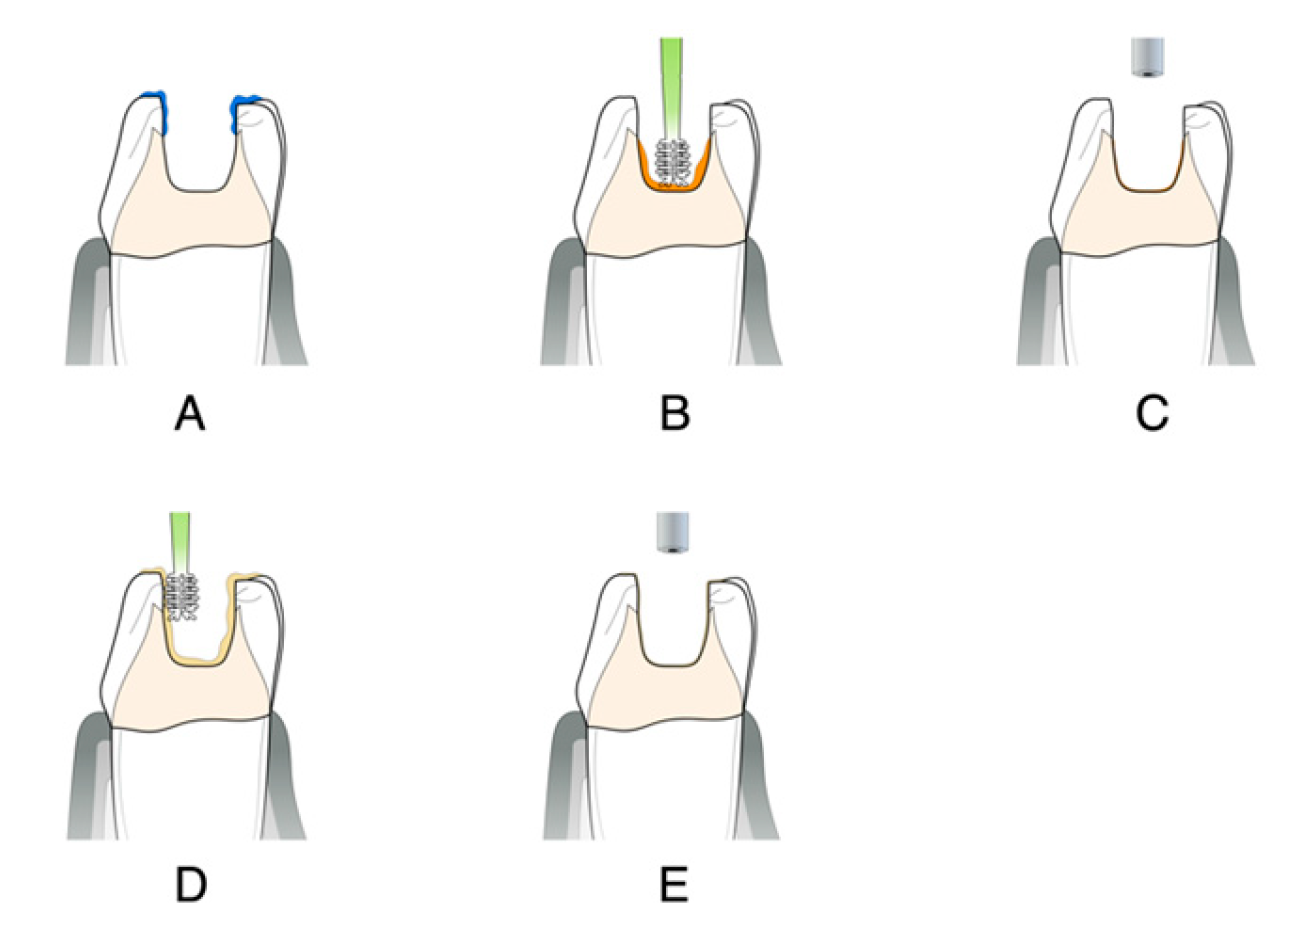
Figure 10.
IDS performed on the pre-molar for indirect restoration.
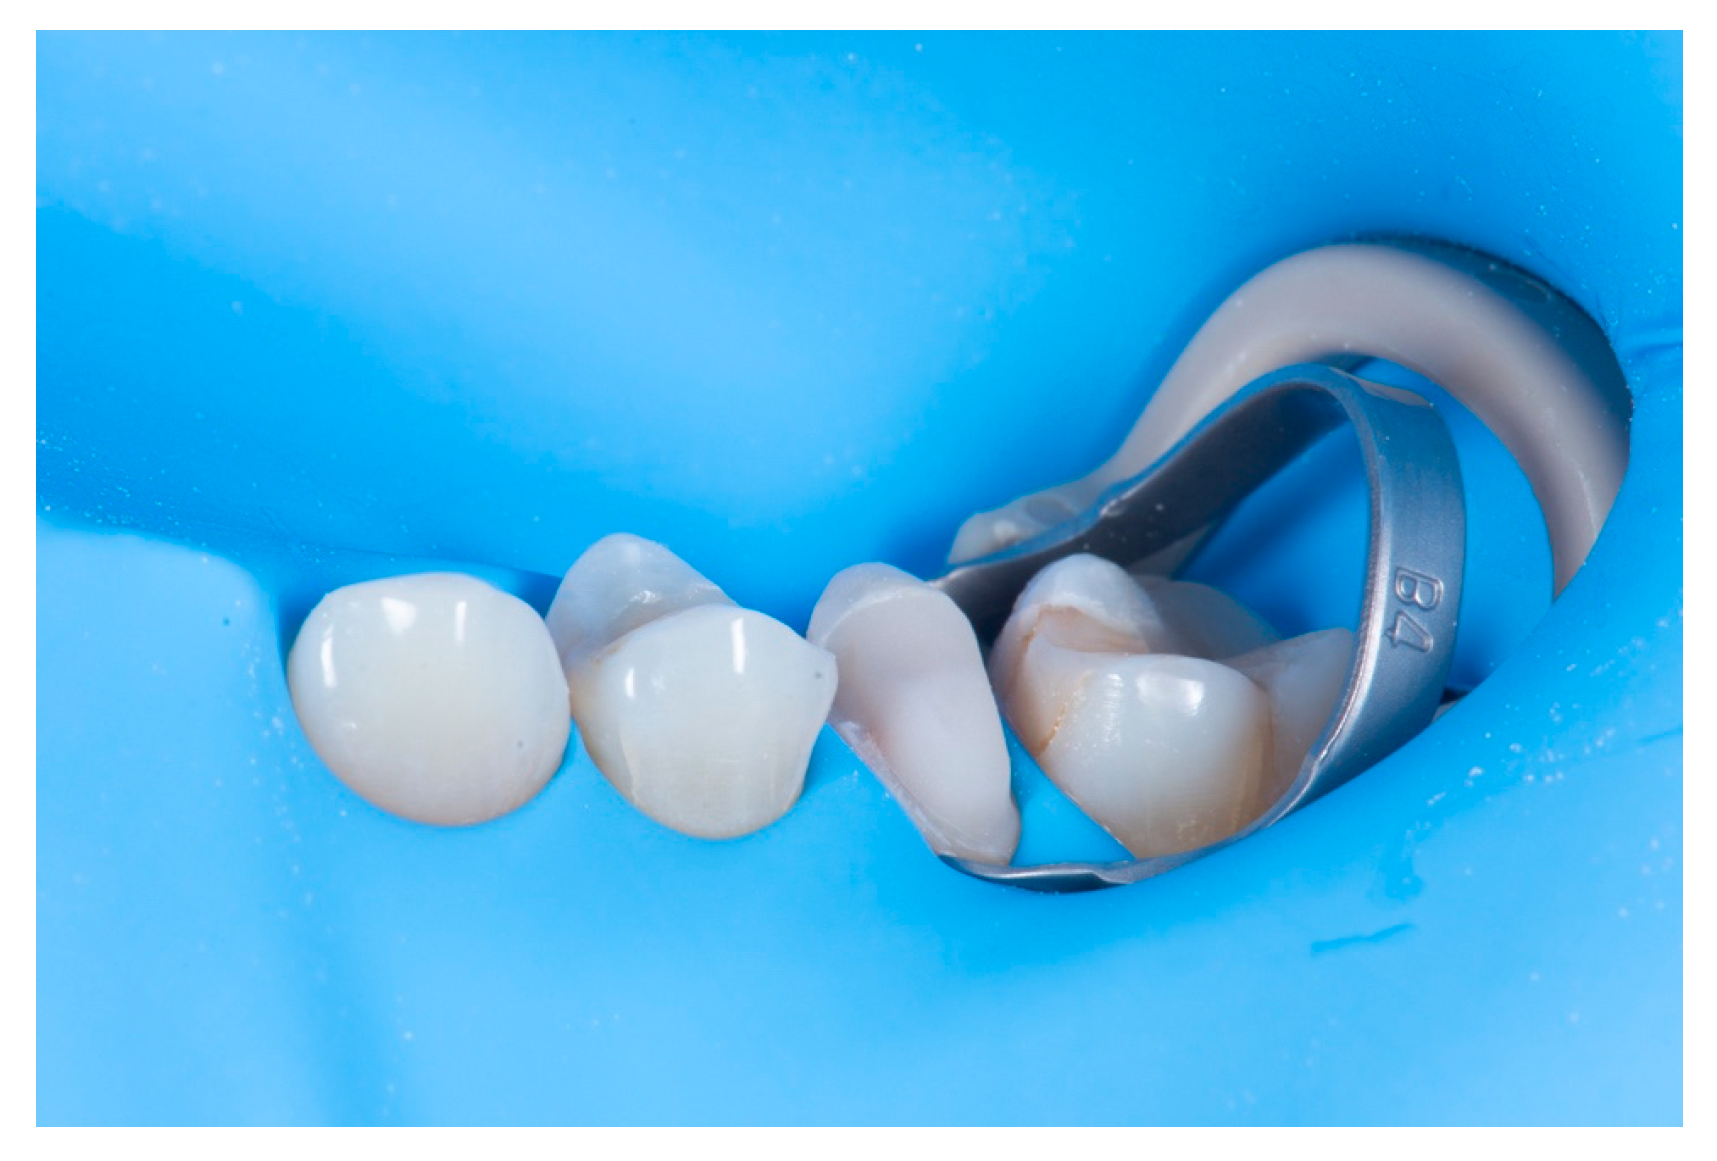
Figure 12.
IDS and preparation under rubber dam.
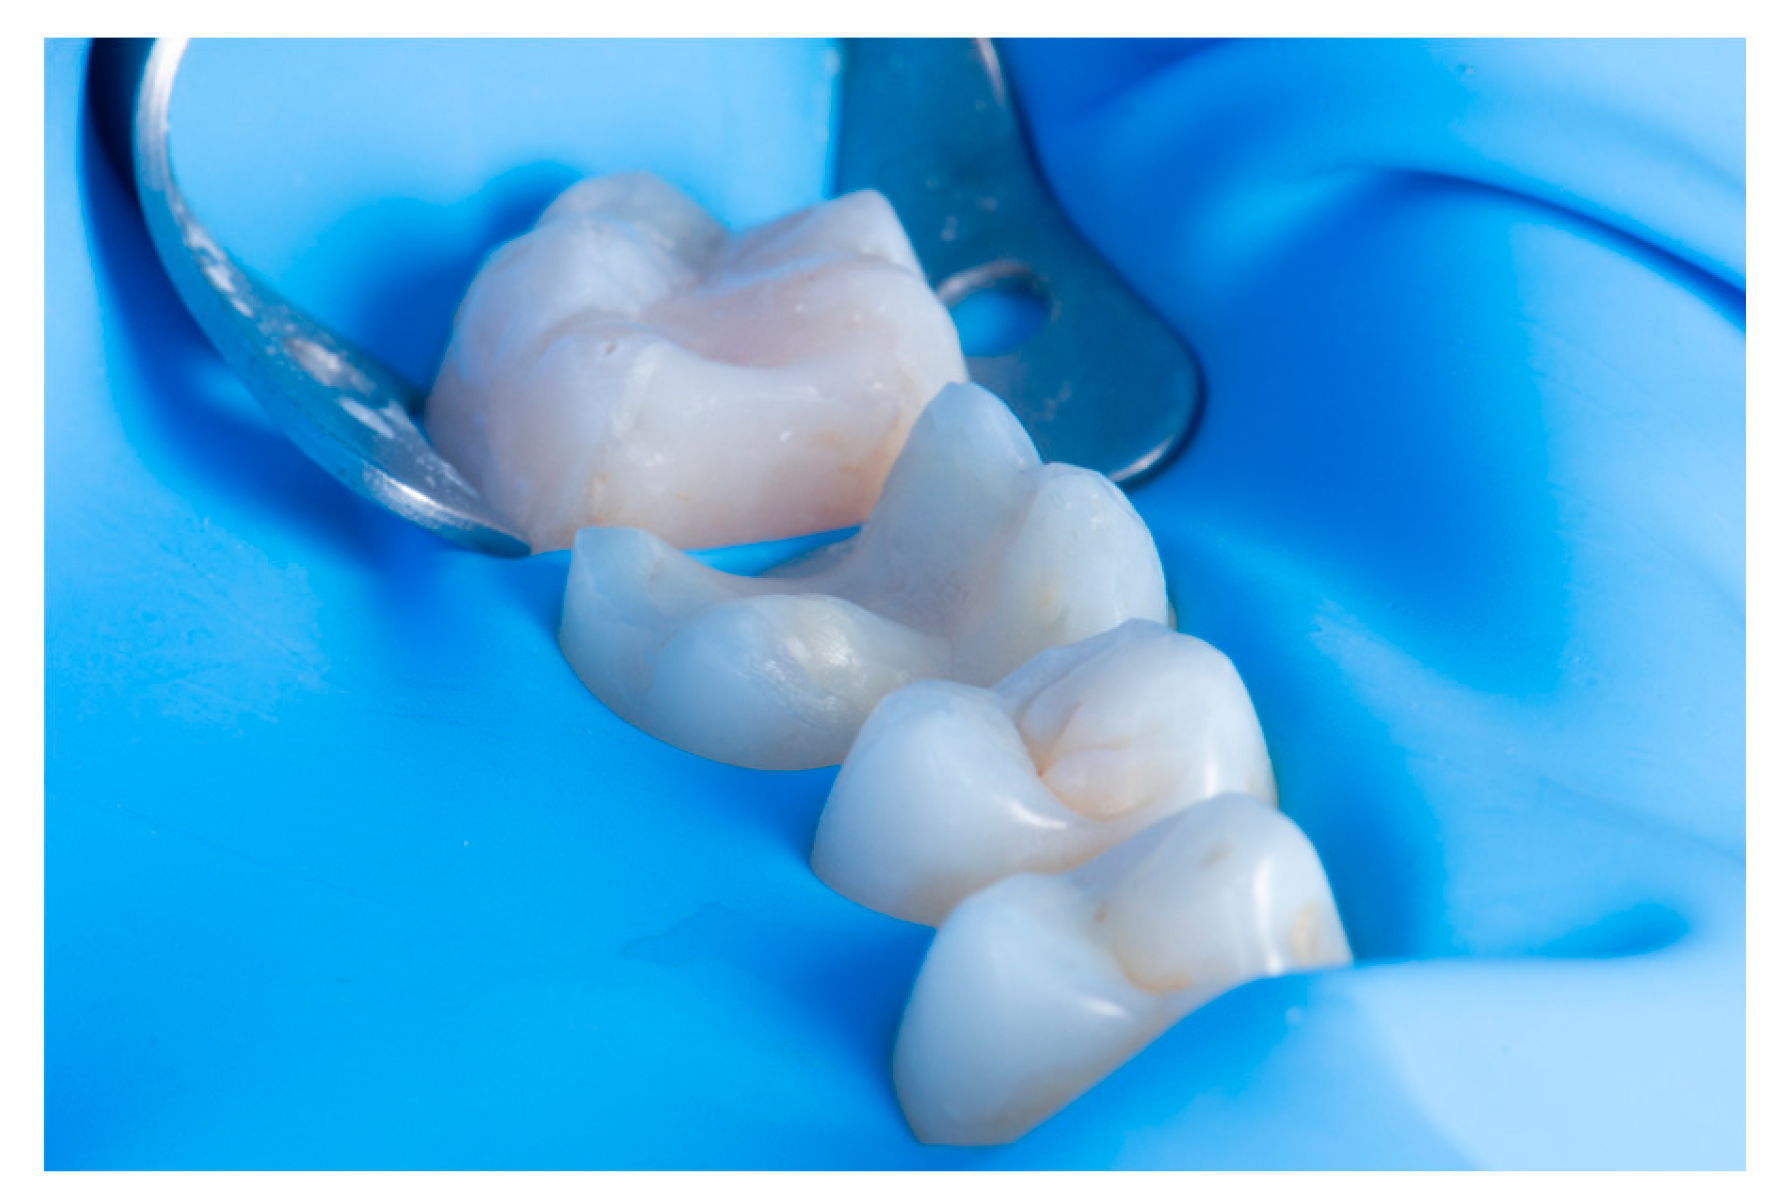
Figure 13.
Intra-oral scan under rubber dam.
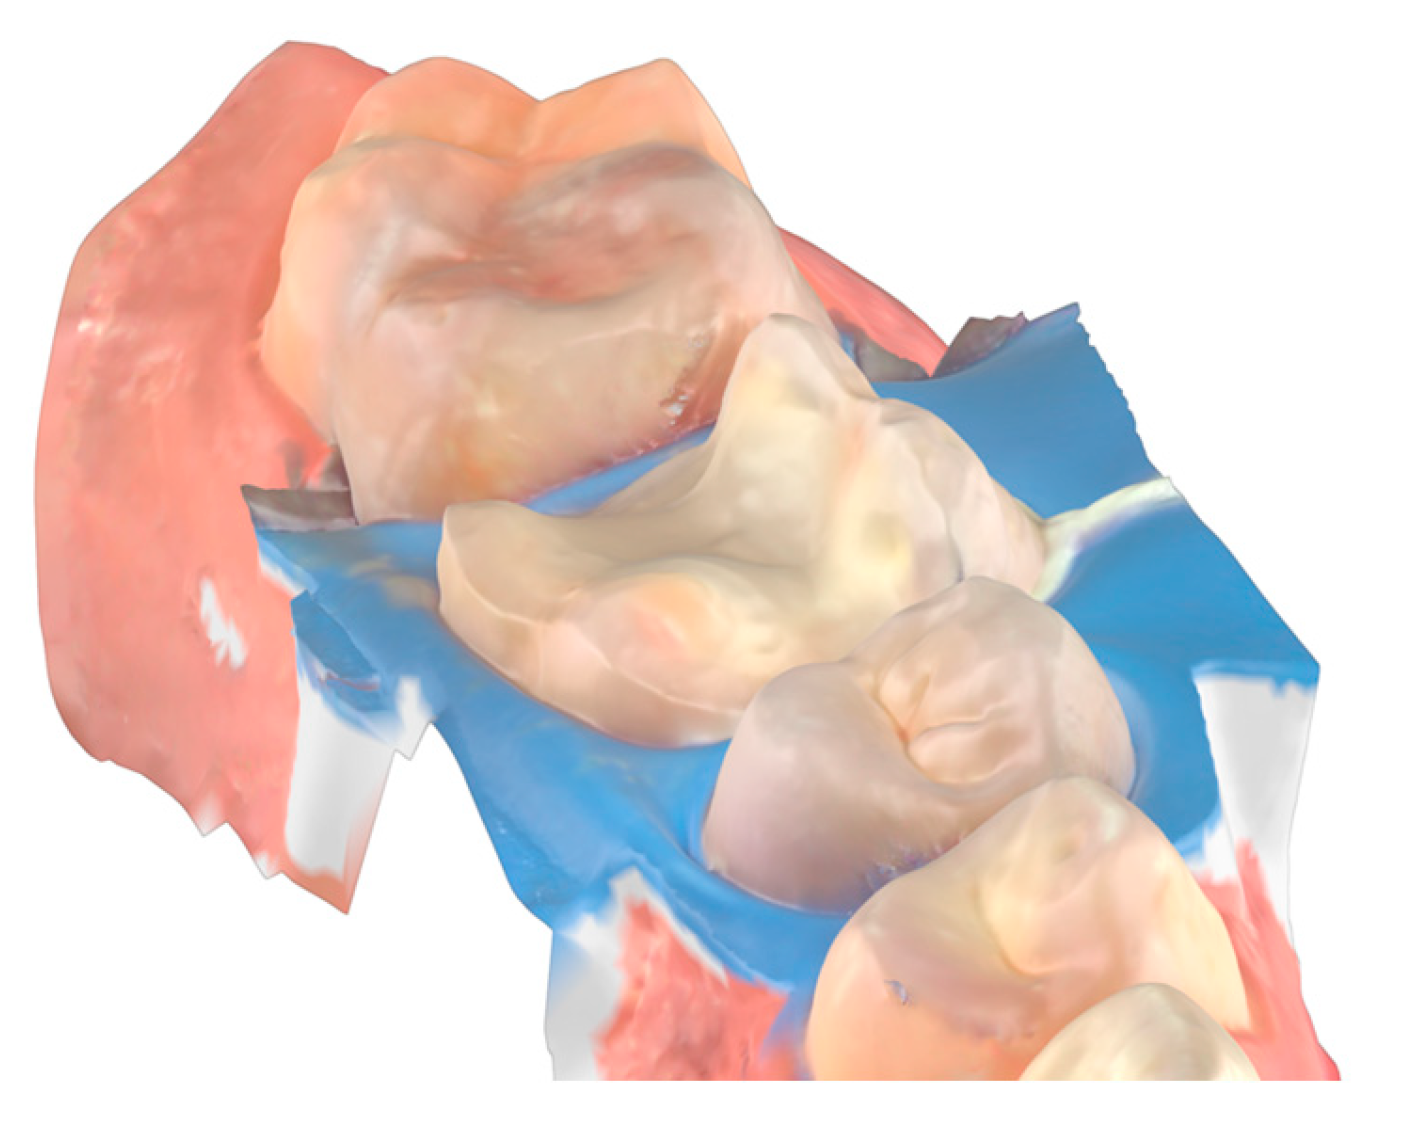
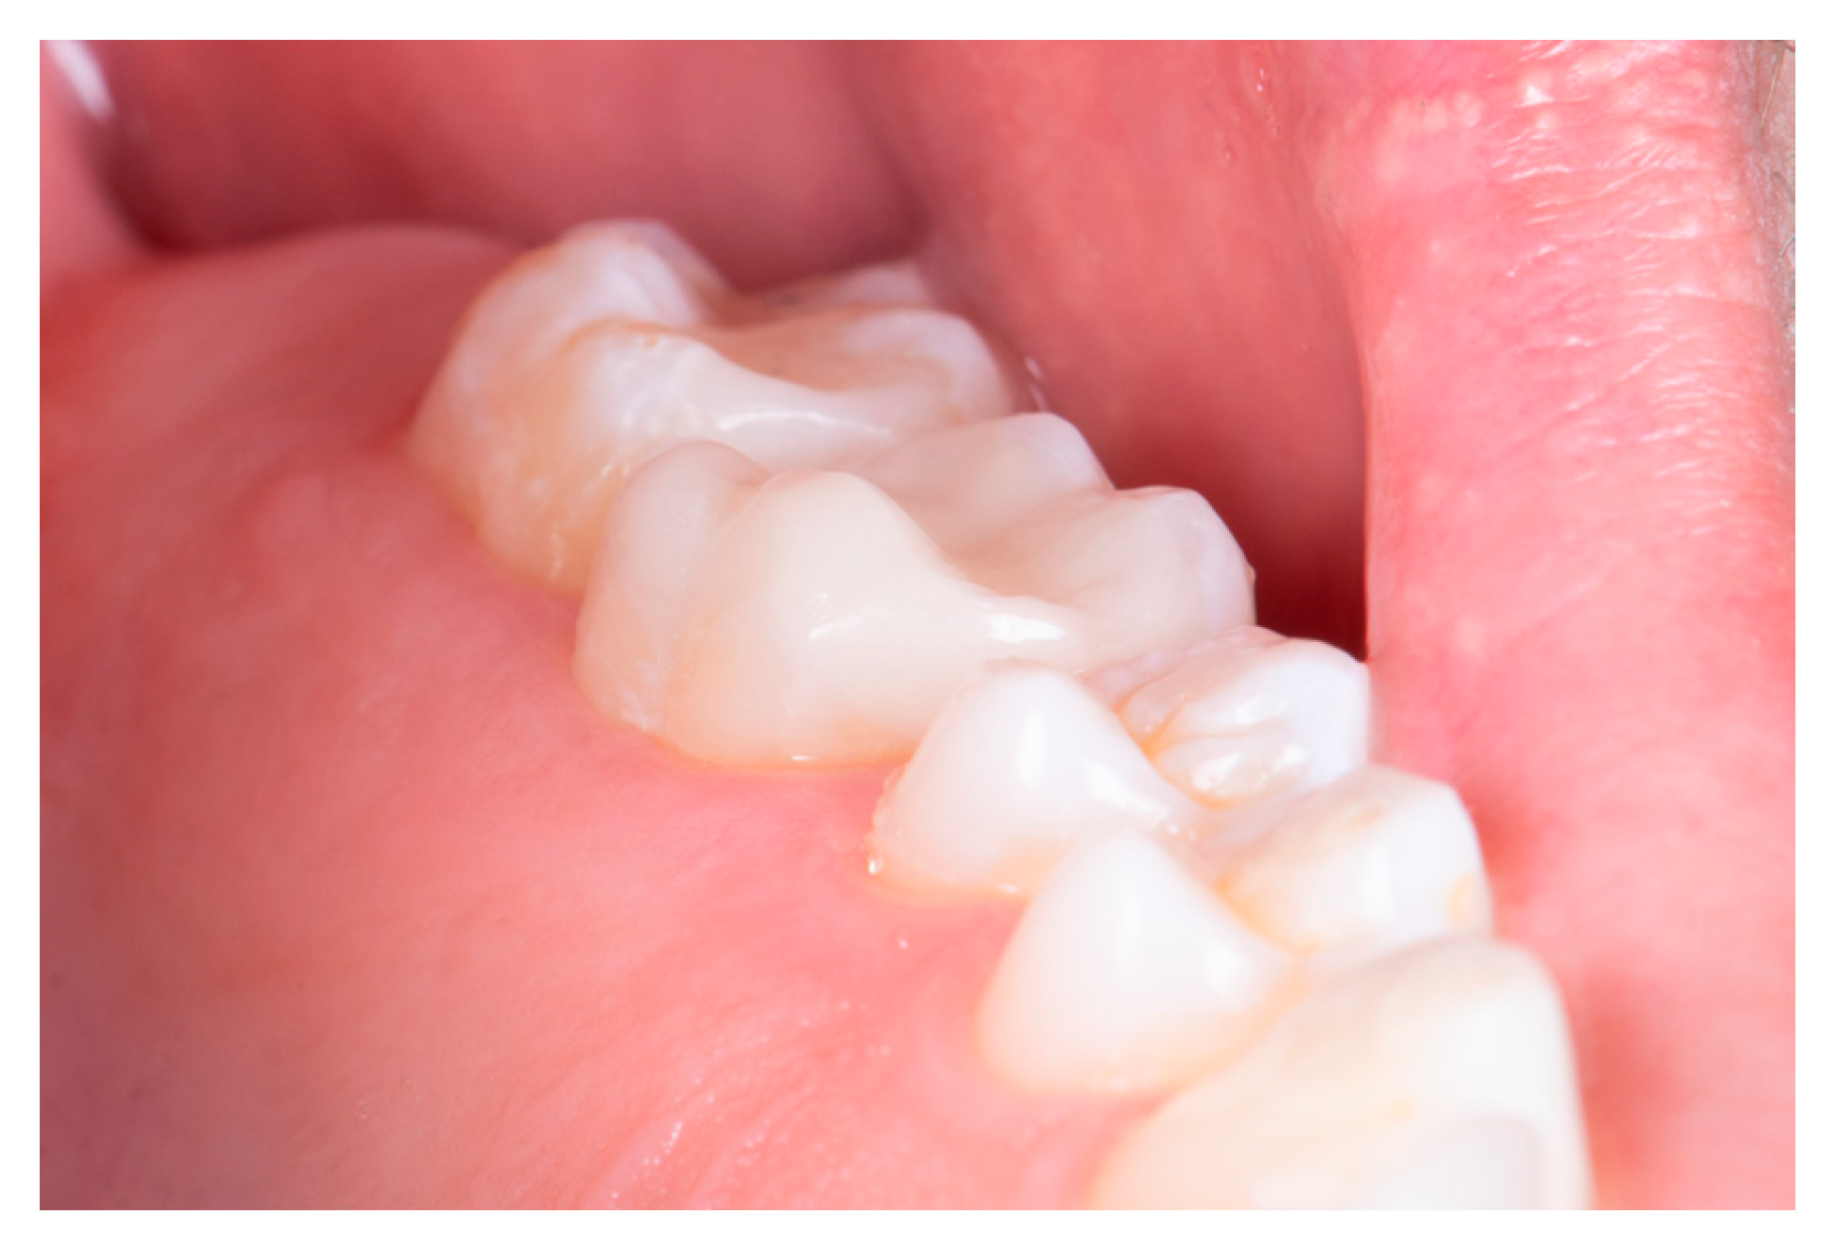
Figure 14.
Final restoration.
Disclaimer/Publisher’s Note: The statements, opinions and data contained in all publications are solely those of the individual author(s) and contributor(s) and not of MDPI and/or the editor(s). MDPI and/or the editor(s) disclaim responsibility for any injury to people or property resulting from any ideas, methods, instructions or products referred to in the content. |
© 2025 by the authors. Licensee MDPI, Basel, Switzerland. This article is an open access article distributed under the terms and conditions of the Creative Commons Attribution (CC BY) license (http://creativecommons.org/licenses/by/4.0/).
Copyright: This open access article is published under a Creative Commons CC BY 4.0 license, which permit the free download, distribution, and reuse, provided that the author and preprint are cited in any reuse.


